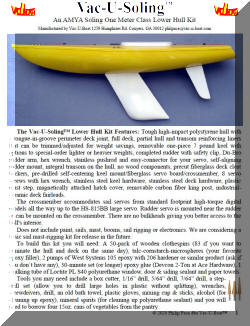
Vac-U-Soling™ Lower Hull Kit.
Manufactured by Vac-U-Boat™
We will be shipping Vac-U-Soling Hull Kits soon. Late May.
Because of the long time that we have been unable to ship kits, a new purchase list will be started. Standard Keel Weight hull kits will be available.
We appreciate your patience.
The Vac-U-Soling™ lower hull kit has been approved by the AMYA Soling 1 Meter™ Class Secretary.
HOW TO ORDER: There is a list. No deposit needed. Just ask by email and you will be confirmed to the list. Email: philpace@vac-u-boat.com When your name comes up, I'll contact you for your shipping address and keel weight requirements. The waiting list is only for complete kits. Replacement parts are available without delay.
THE LIST: You will know you are on the list when you receive a confirming email. If you get no confirming email, assume you are not on the list and request again. I'll be glad to check my inbox, sent items, deleted items, spam folder and list for your request in order to put you into the correct spot. I can't fix what I never received. Please check your sent-items, outbox or drafts folder to be sure your original request was sent. Also check other names or email addresses you may have used for the original request because I may have you on the list by another name.
PRICES:
Prices are subject
to change as material costs change, even after you get on the waiting list. We
appreciate your understanding.
The Vac-U-Soling lower hull complete kit
$220 + postage.
Individual parts listed below do not include postage.
Laminating Epoxy Kit: Includes two "one-pump" sets of West-Systems 105 Epoxy Resin and 206 Slow Hardener needed to laminate the Deck Reinforcing Liner and the Hull Reinforcing Liner. Should be used within 4 weeks of shipping. $6.
Vac-U-Soling complete Keels $75.
Vac-U-Soling Hatch Covers White $10, Clear $12. Note: This will not fit a vintage Soling One Meter deck. Those are available below.
Vac-U-Soling replacement Rudder with clip $18 or $2 more to include a DuBro Rudder Arm, Set Screw & long Hex Wrench. Weighs 2.0 ounces. This rudder is an aftermarket fit for the Vintage Soling1M.
Aftermarket Hatch Covers that will fit the Vintage Soling1M Deck. White $10, Clear $12.
All other parts and bits are available. Just ask. Buyers are responsible for import duties or taxes for international orders.
IMPORTANT SHIPPING NOTICE: Thanks to "Dimensional Weight" where larger packages are charged by volume, not by weight, a Vac-U-Soling kit is billed as if it weighed 20 pounds even though it weighs only 12 pounds. Shipping can run from $25 to $65 in the USA. However, when you ship two Vac-U-Solings in the same box, the additional cost can be as little as $4 more than shipping a single kit. Folks on the list who have buddies in the same club should get together and let me know to combine such orders to save on shipping.
VINTAGE SOLING REPLACEMENT KEEL NOTE: The Vac-U-Soling keel is mounted to the hull with two 1/4-inch stainless steel threaded rods. The location and diameter of the two threaded rods fall within the dimensions of the vintage plywood keel spar where it exits the body of a vintage keel. It is possible to modify the Keel Box of a vintage Soling1M to accept a Vac-U-Soling keel. Exactly how is up to you. Those who have done this should post a how-to article on the Forum.
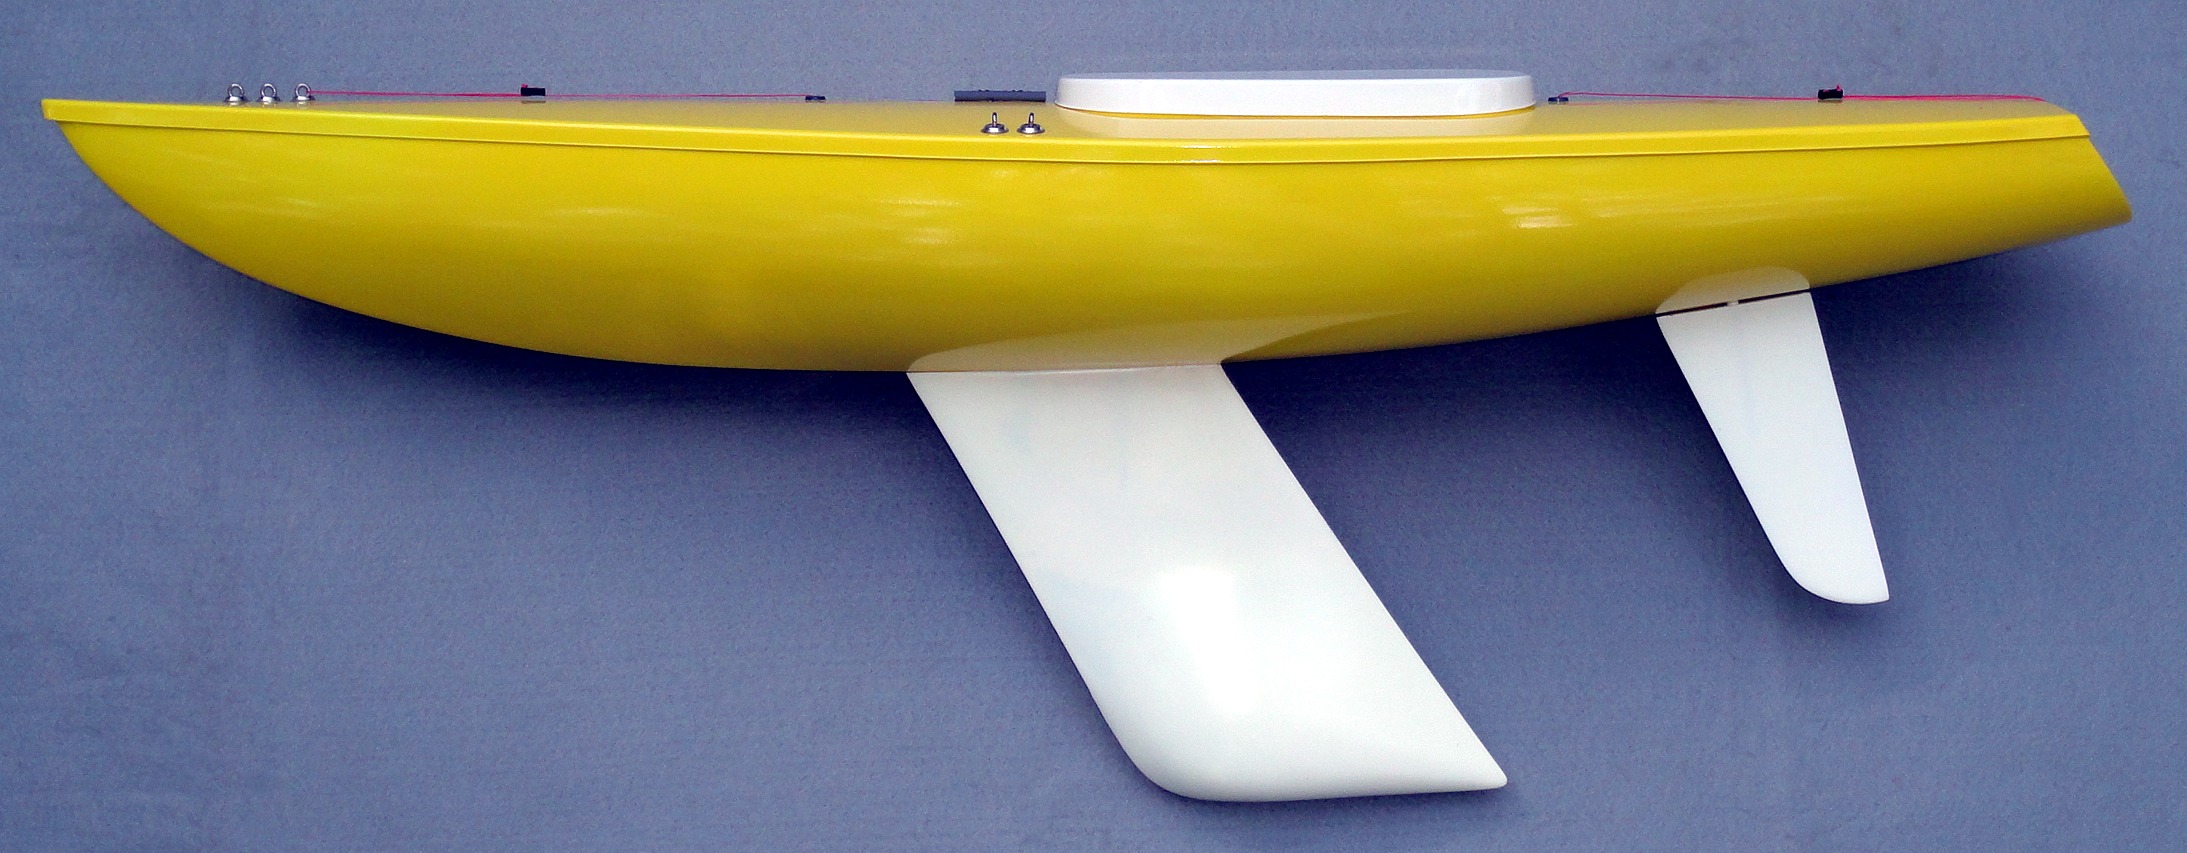
KEEL WEIGHT: The standard 6 pound 12 ounce keel will make a finished Vac-U-Soling, including electronics & all rigging (not included), in the range of 10 pounds when built according to the instructions. Keels are built with 1/4th inch stainless steel threaded rods for mounting, cast polyurethane resin and #8 lead shot. Vintage Soling keels were approximately 7.0 pounds. The Vac-U-Soling hull is a little heavier than the vintage Soling so a lighter keel is needed. Heavier or lighter weights are available for no additional charge.
IMPORTANT PAINTING NOTE ABOUT THE KEEL, RUDDER & RUDDER MOUNT: These parts are made of poured resin. A wax-based mold release is used in forming these parts. Before scuffing & painting, clean these parts with alcohol or soap & water to remove any waxy residue. Alcohol seems to work well. Tape test: Masking tape will stick to their surfaces when the mold release is gone.
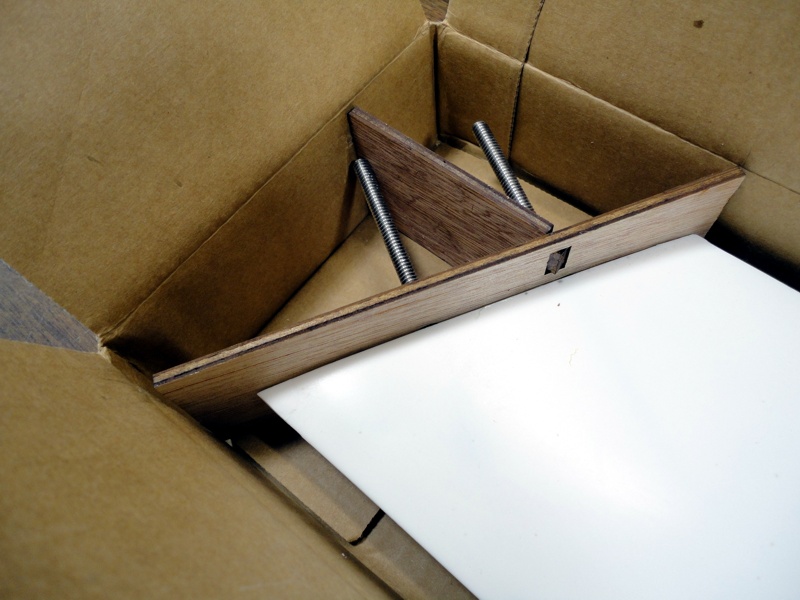
KEEL PACKAGING: The packaging includes laser-cut plywood baffles that brace the keel in place in its box. The keel box is hot-glued and strapped inside the kit's box to keep it from breaking free during shipping. Because of the laser-cut wood, you may notice a slight wood-smoke odor when opening the keel box.
 |
 |
 |
USE THE FORUM: As kits are built, I encourage you to post your experiences on the Forum at the Soling One Meter website at http://soling1m.com/ Share the good and the bad to help new builders have success with their builds.
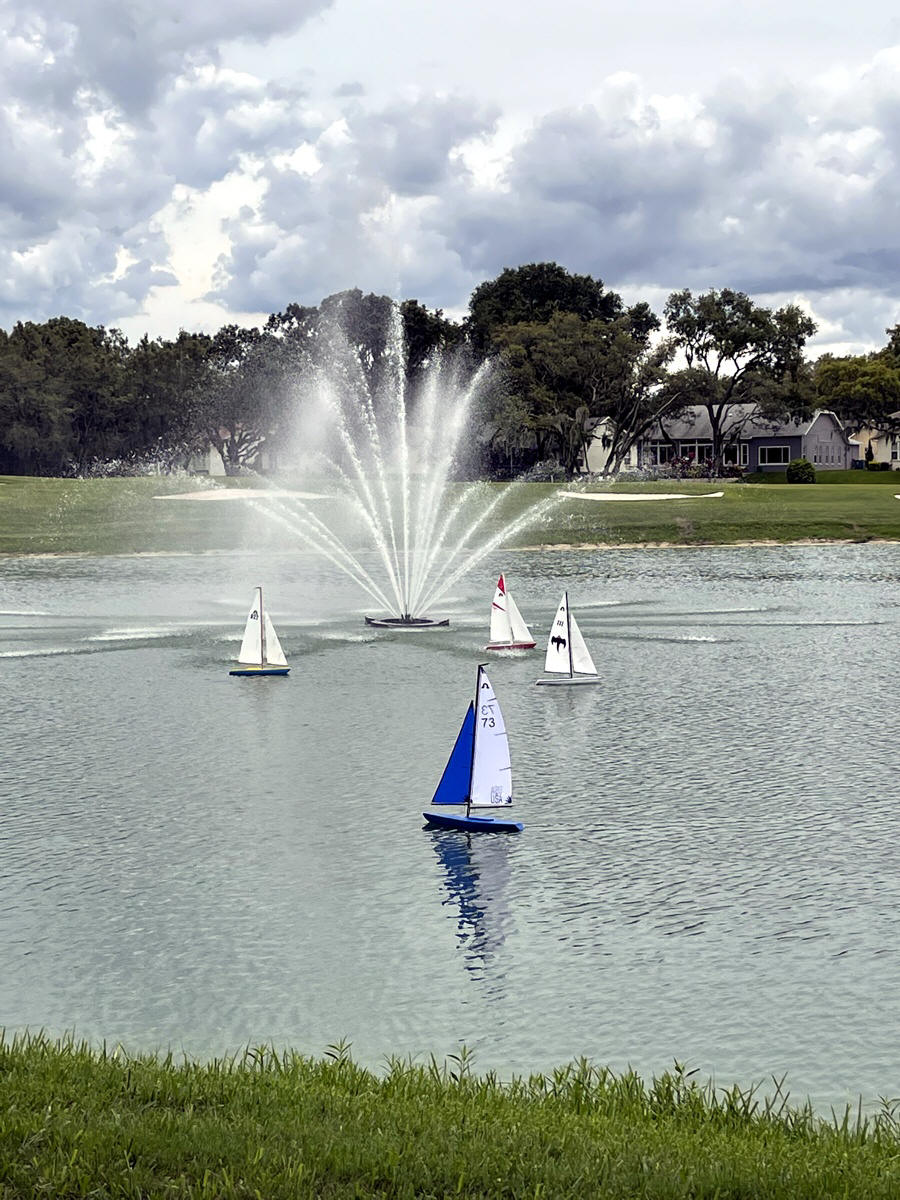
This is NOT your father's Soling.
Updates from the latest build including all revisions to the trial kits are included in the latest instructions below.
PRODUCTION VERSION HULL WEIGHT: Including the hatch cover & magnets, thinner deck with full deck liner, smaller hull liner, thinner transom liner, thinner king post mount, lighter keel shoe & shelf reinforcements, two anchor point reinforcements, all deck hardware, wired crossmember, rudder mount, rudder servo mount, smaller battery tray, keel nuts & washers & 3 coats of paint, without keel, without rudder & linkage, without servos or other electronics, 2 pounds, 3.7 ounces. Add rudder, linkage & arm 2.4oz, receiver .4oz, sail servo + arm & screws (GoBilda Torque) 2.8oz., rudder servo HS225BB .9oz., battery 1,200mAh 4.0oz., sails & rigging 9.0oz for a total of 3 pounds 3.5 ounces. With a 6 pounds 12 ounce keel, total weight would be about 10 pounds.
The trial kits were made with some hand-fabricated parts the same way you might make them when building a single boat for yourself. Custom plastic parts were copied using economical rubber molds and poured resin. While great for a one-off build, such methods are too labor intensive for the efficient production of boat kits. While we are waiting on more hardware bits to arrive, we are adjusting the process of making parts for the Vac-U-Soling kit. The goal is to make them lighter, stronger, and to reduce the labor necessary to produce them. We are also making adjustments to the vac-u-forming molds based upon feedback from the trial builds. Further refinements have been added such as taller ceramic deck fairleads and additional circuitry to the crossmember so you will see a blue LED light to indicate at a glance when the power is on.
PRODUCTION KIT FEATURES
Paint, servos, sail servo arm, rigging lines, glues & sealants shown are not included.
Click on photos below to enlarge.
 |
 |
 |
| Fully reinforced deck. No special tools required. | Deck fittings included. | Easy to align & check alignment of parts. |
 |
 |
 |
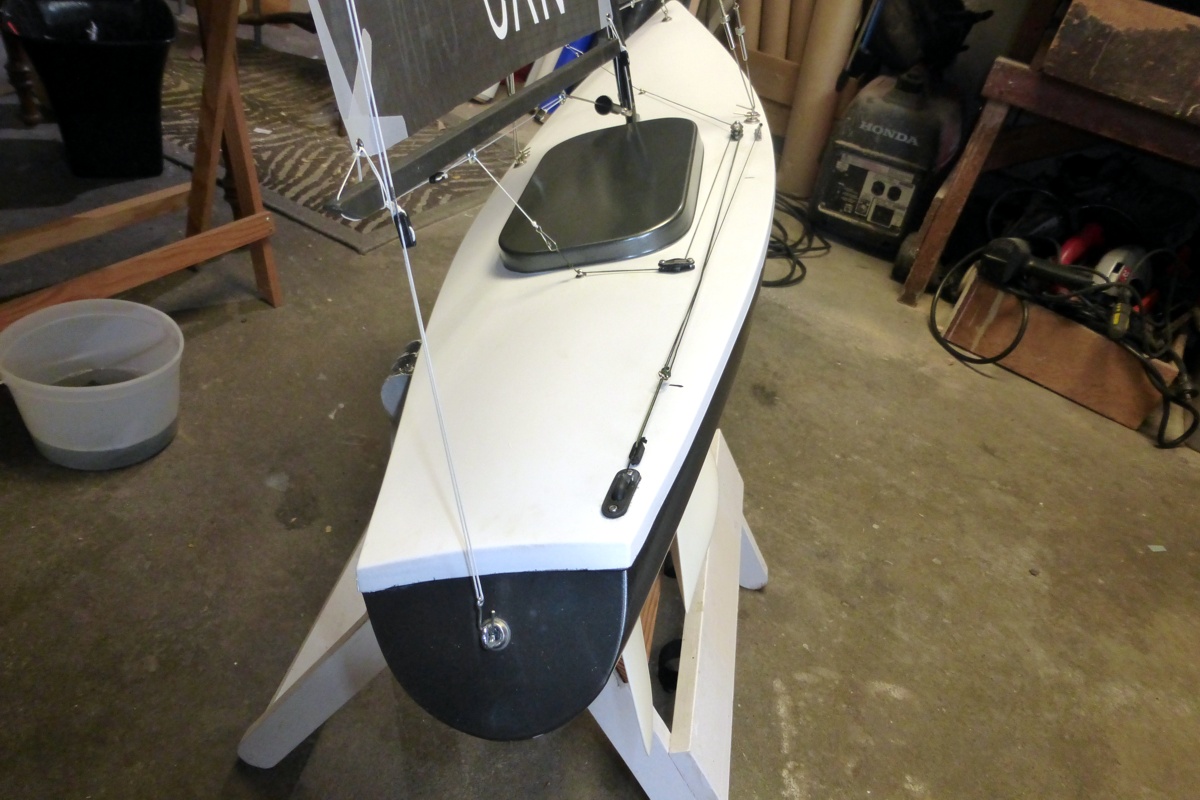
| Self-aligning Keel & Rudder mounts. | Transom molded into hull. | Removable Nylon Fairleads with Alumina-Ceramic eyelet inserts. |
 |
 |
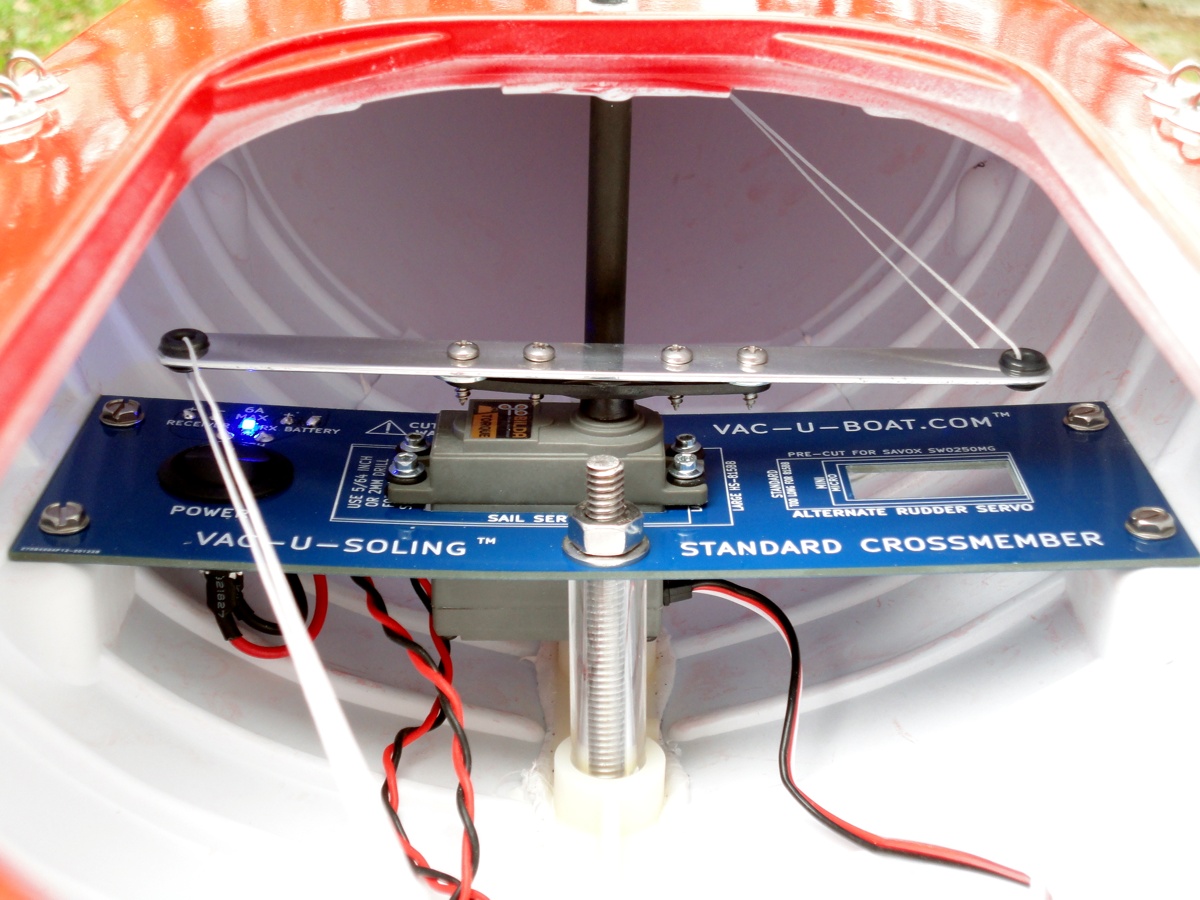 |
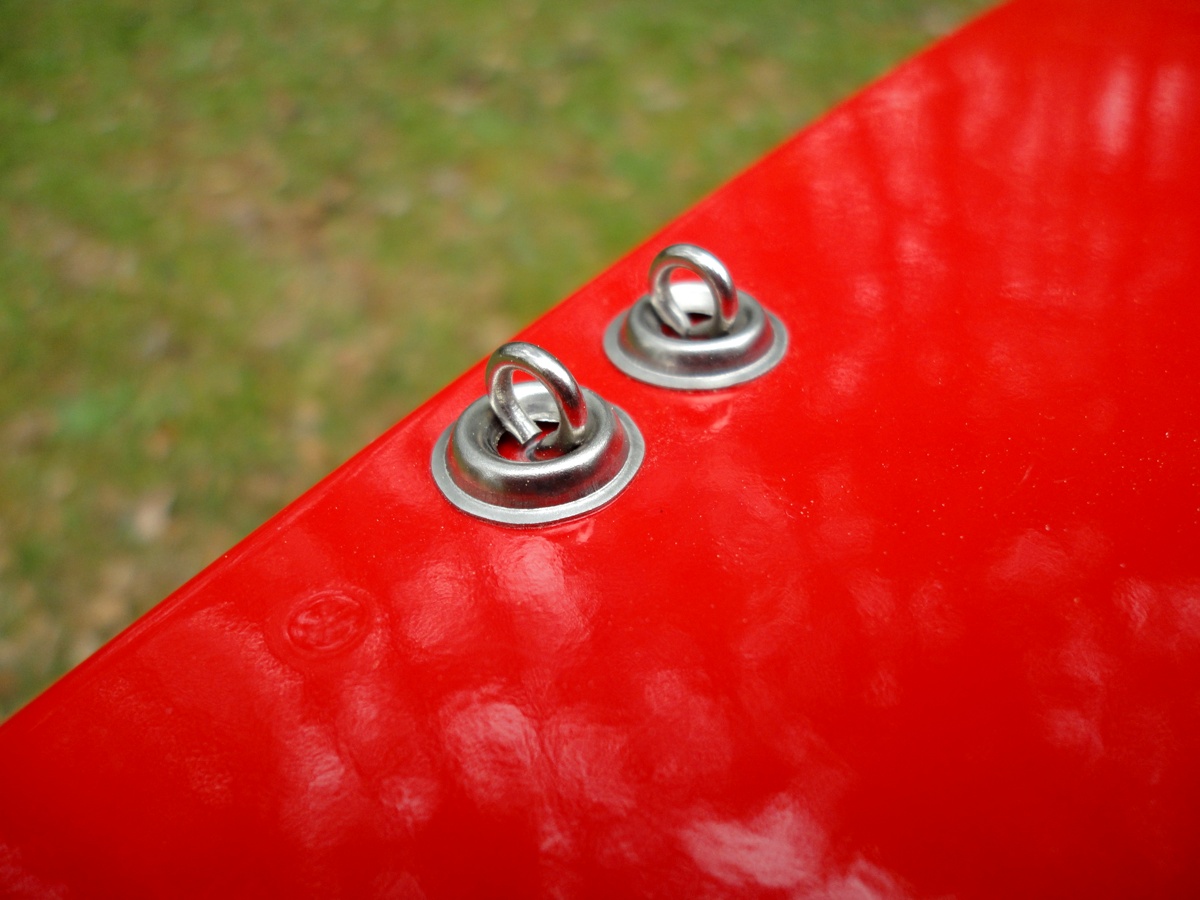
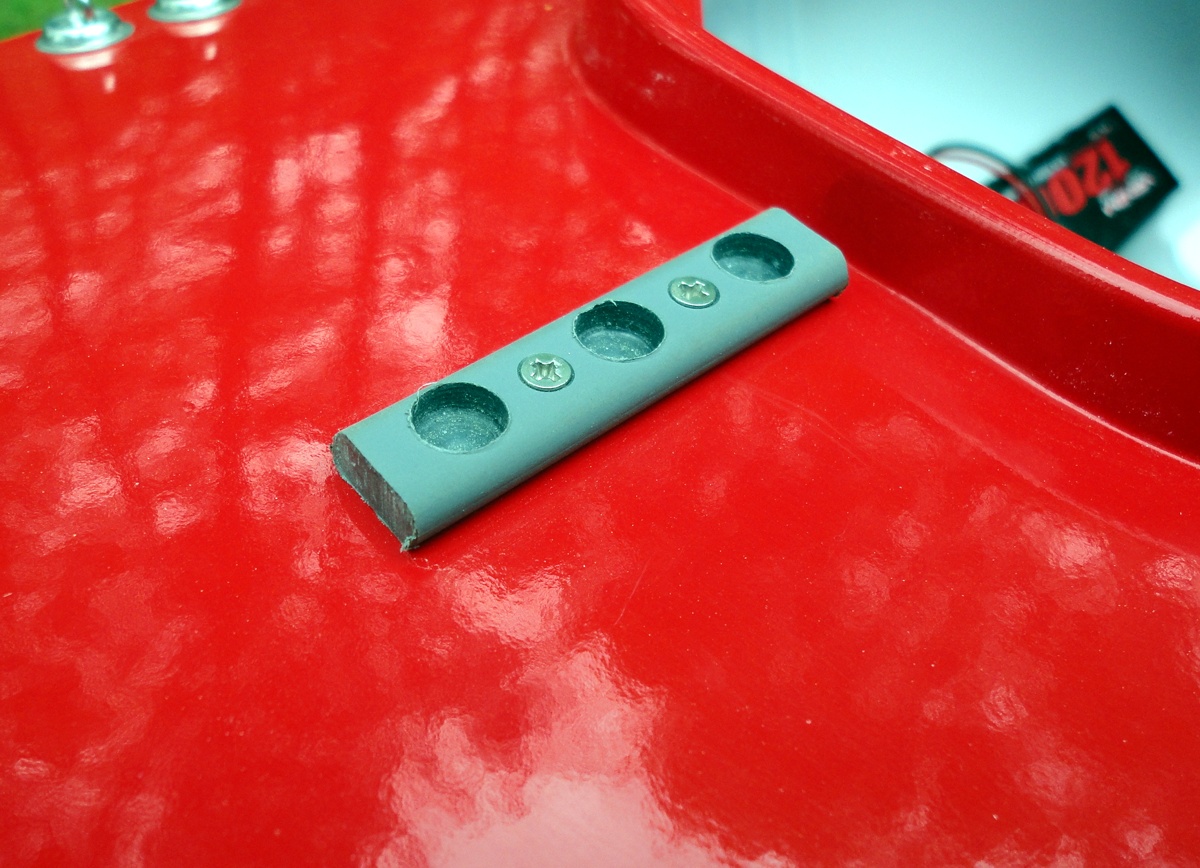
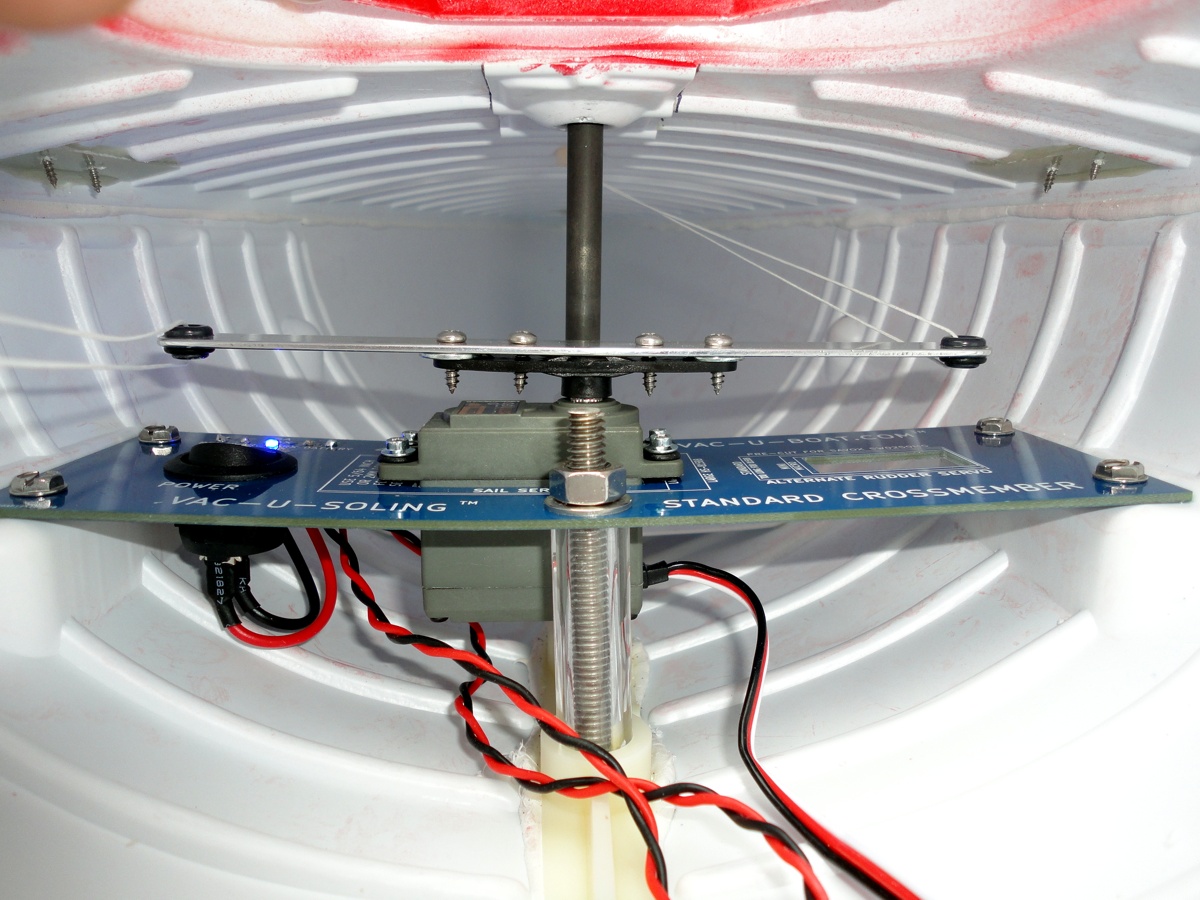
| Stainless screw-eyes & flanged washers to support side-loads. | Plastic Mast-Step with stainless steel screws. | Removable keel, prewired crossmember/servo board. |
 |
 |
 |
| Self-aligning rudder & servo mounts. Linkage included. | Reinforcing inner structure. Removable Kingpost. | Good interior access. |
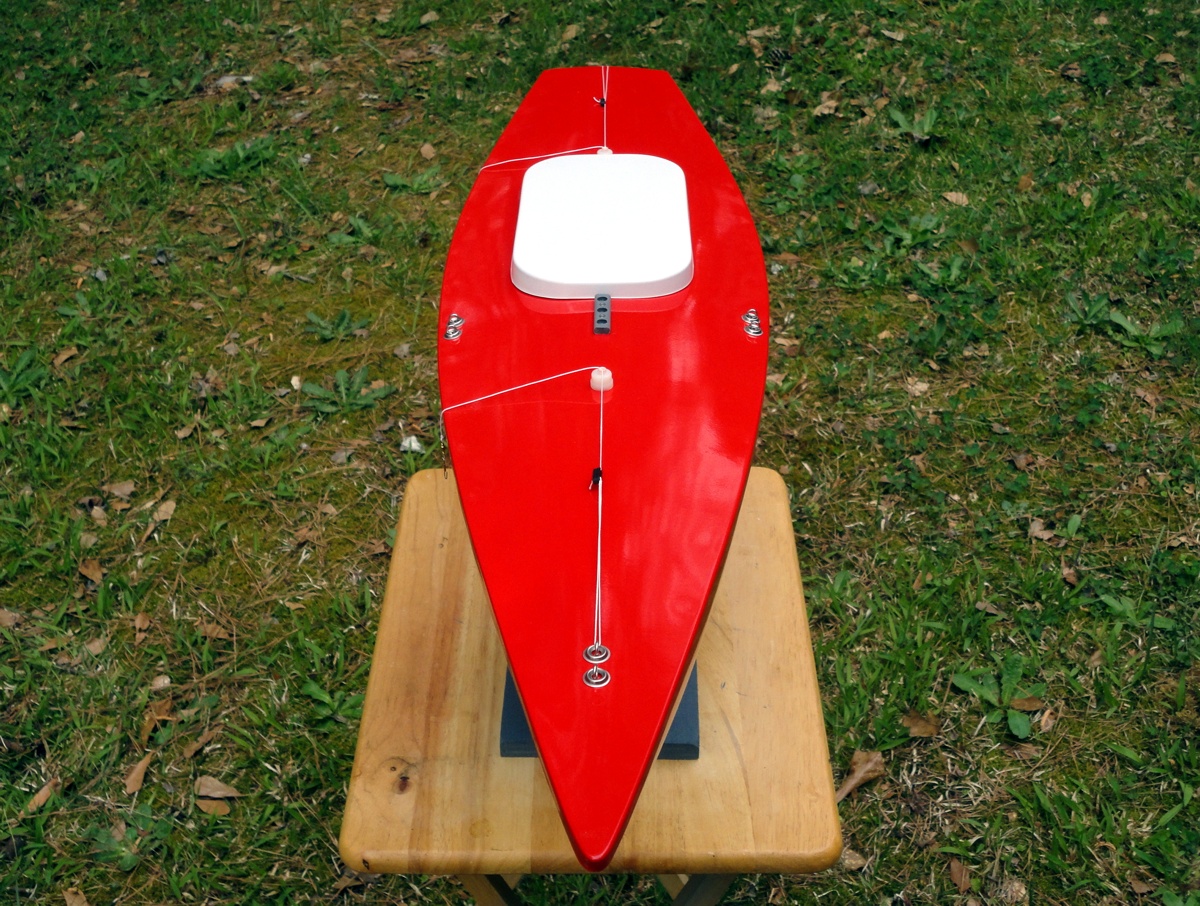
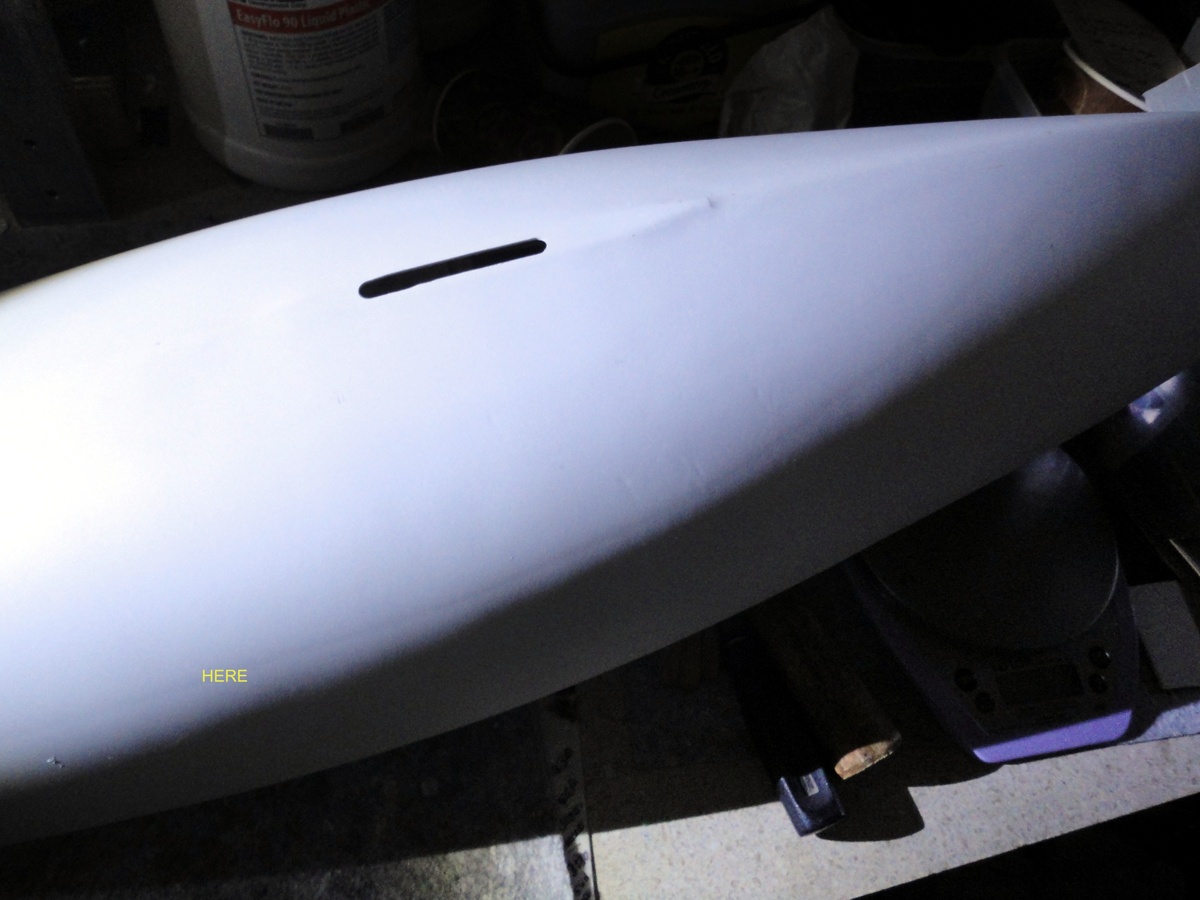
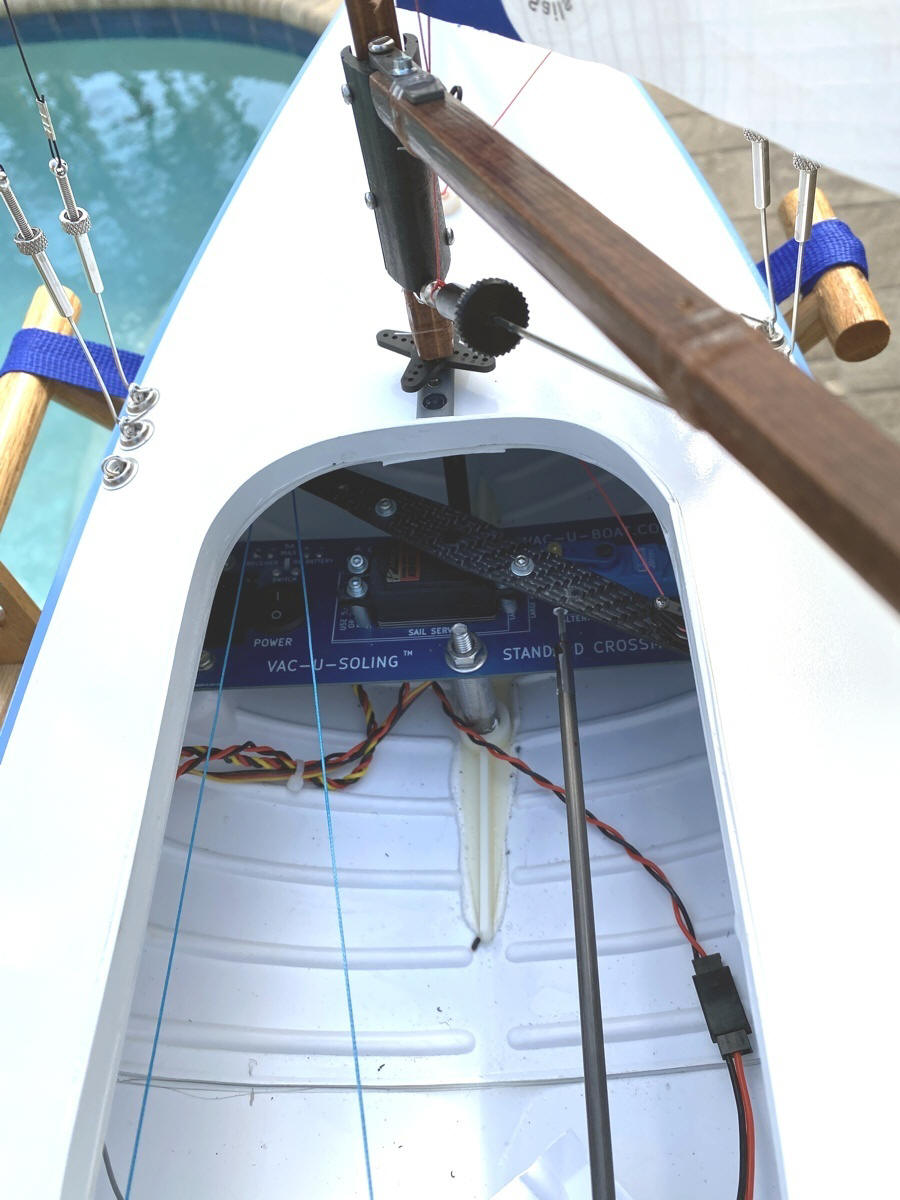
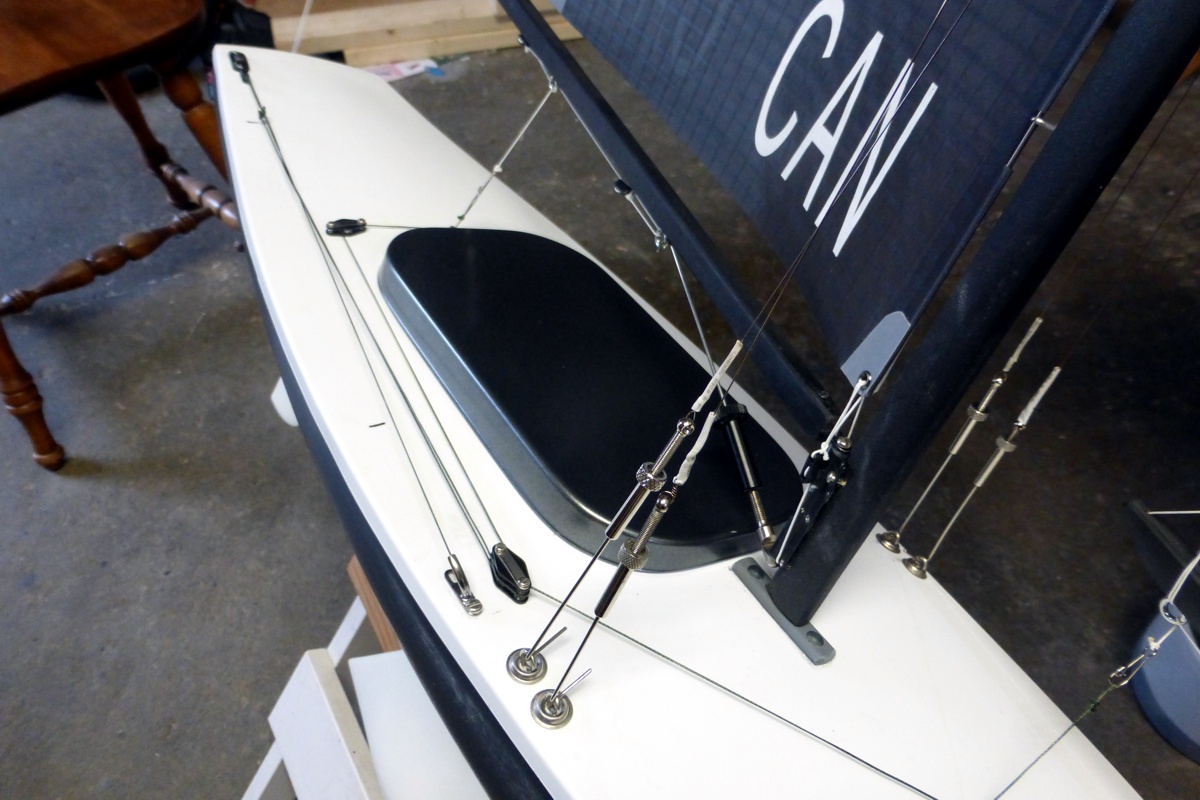
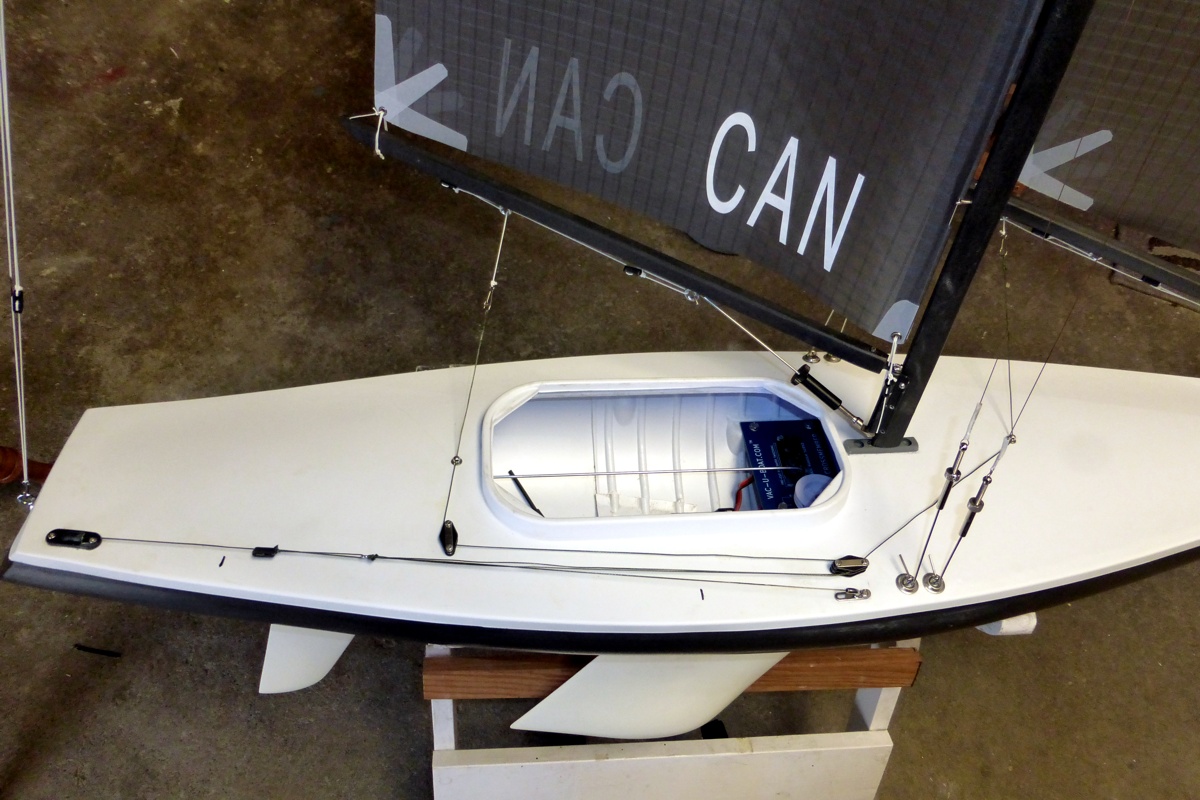
| The keel and rudder are complete and ready to install. The standard keel weighs 7.0 pounds. Custom weights are available for no additional cost. The rudder includes a self-aligning rudder mount, Du-Bro rudder arm, stainless pushrod and EZ-connector for your servo. Deck cleats (chain-plates) are backed with fiberglass board. Keel mounting hardware and deck hardware are stainless steel. Removable fiberglass pre-wired & lighted lead-free crossmember accommodates sail servos from standard footprint high-torque digital models all the way up to the HS-815BB large servo. It is pre-cut for a standard sail servo and a mini rudder servo. Your rudder servo can be mounted near the rudder or alternately mounted on the crossmember. There are no bulkheads, giving you better access to the hull's interior. The red & black wire battery & receiver extensions are prewired to the crossmember. Included servo screws have hex heads & wrench for easy access. A long hex wrench for reaching the rudder arm set screw is included. Additional features include a removable carbon fiber king post, industrial ceramic nylon deck fairleads, tongue-in-groove perimeter deck joint to hull, full deck & partial hull & transom reinforcing liners and eight rare-earth magnets are included for the hatch. The kit has no wood components. With "plastic-friendly" type paints, no sanding is required for the hull & deck. The keel & rudder should be cleaned & scuffed prior to painting. | ||
 |
 |
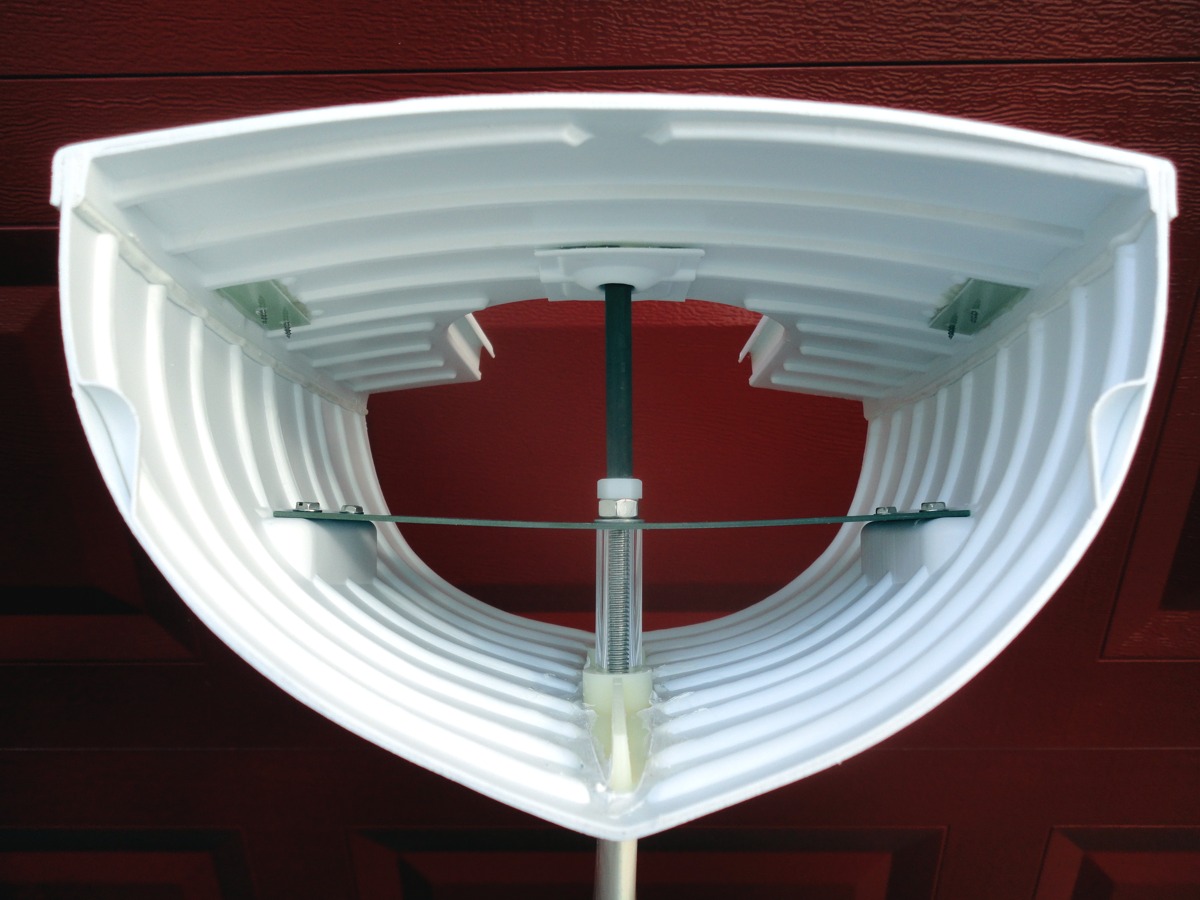 |
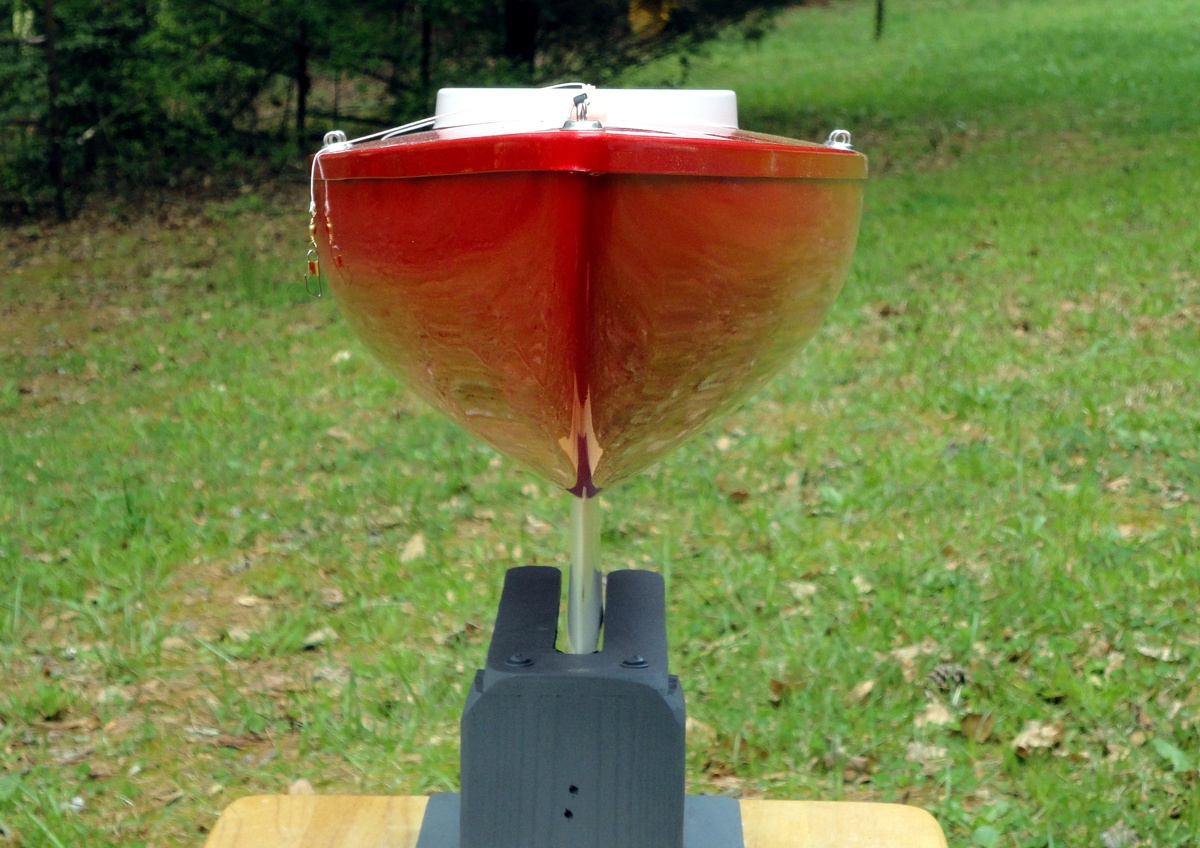
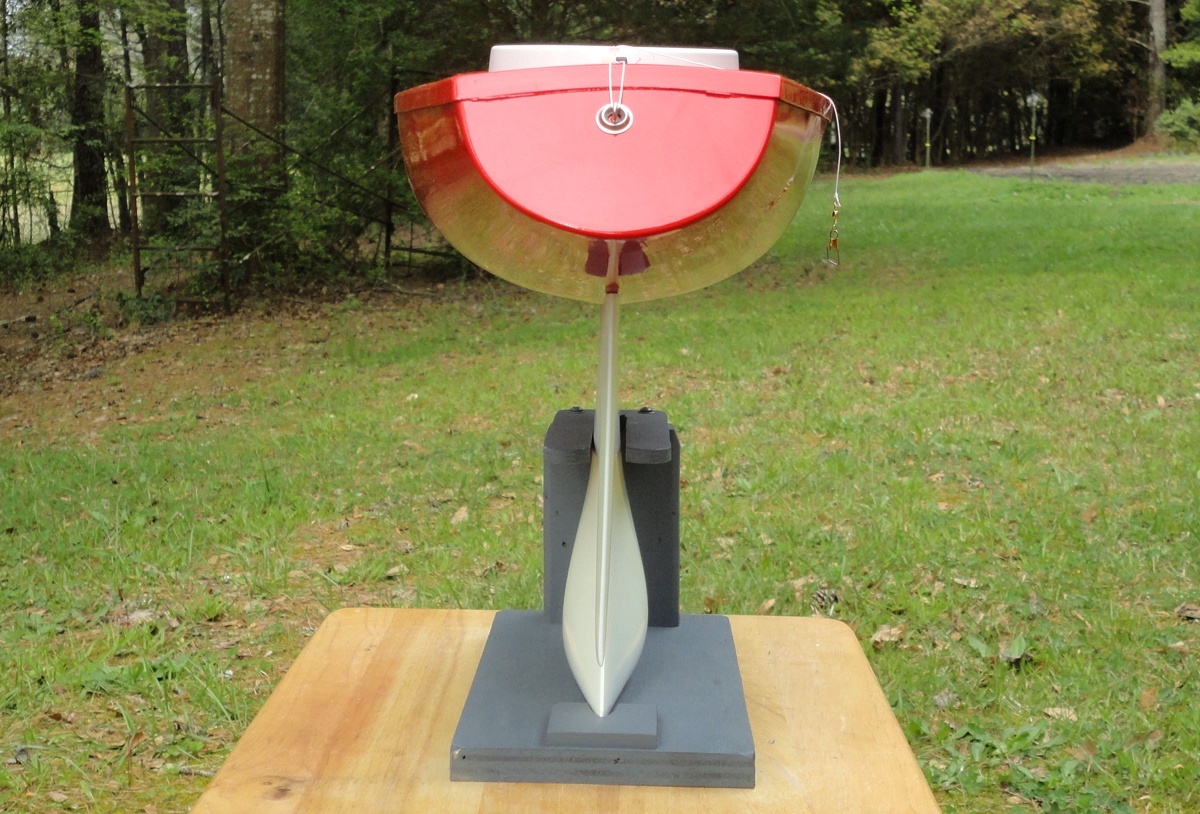
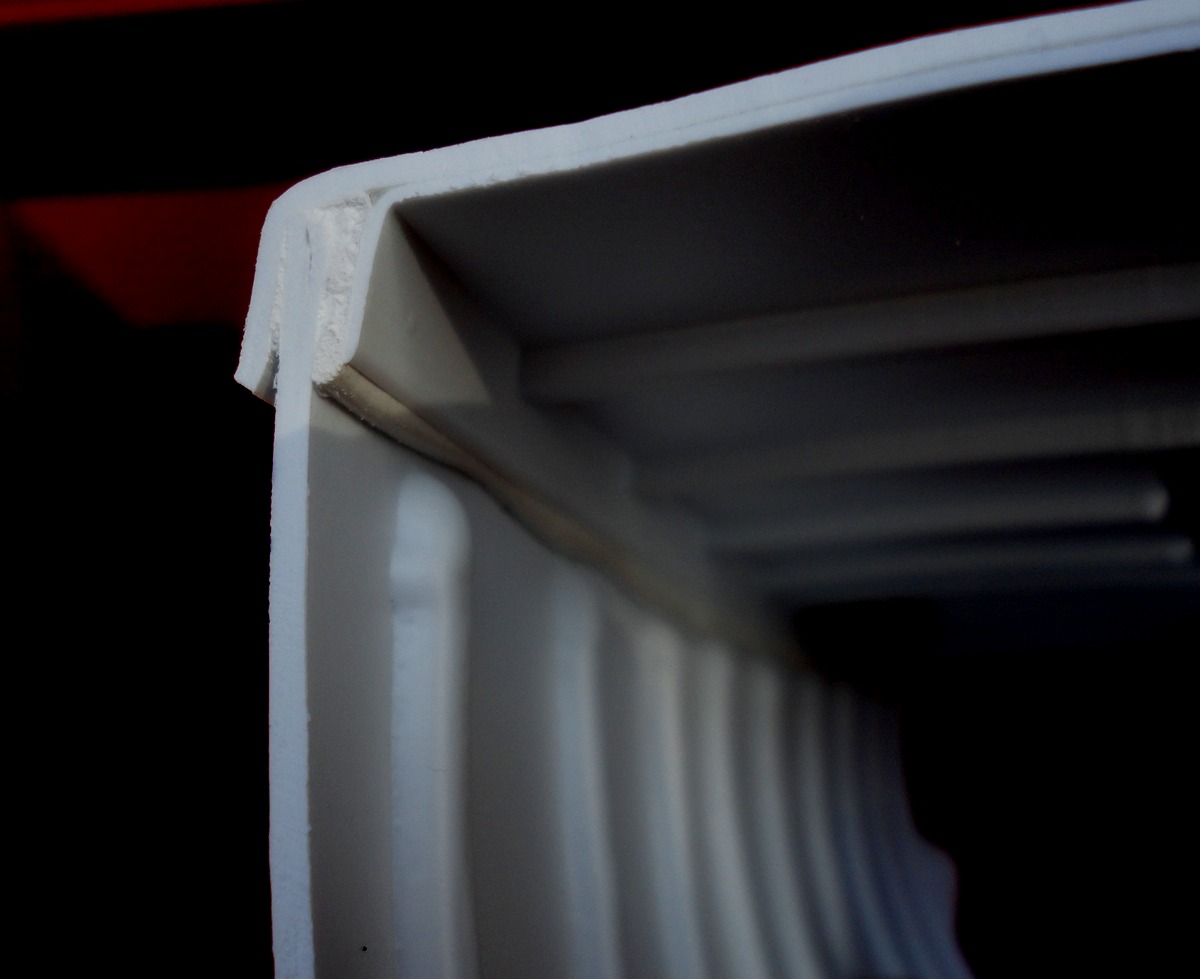
| Tongue & Groove perimeter deck seam. | Cross-section view from stern. | Cross-section view from bow. |
Does not include paint, sails, mast, booms, sail rigging or electronics.
~ INSTRUCTIONS ~
Production Build Instructions updated May 26, 2022. 29 pages with around 350 photos.
 Latest changes: May 26, 2022. Page 5: Clarified the deck clamping strips are temporarily attached to the top of the deck and that the deck reinforcing liner is scored from underneath, leaving a raised lip around the top of its hatch opening. Page 10: Corrected name of part in right upper photo as Transom Reinforcement.
|
|
When you load them, look for this date on the instructions to confirm they are the latest version:
|
| Click below for a review on YouTube. |
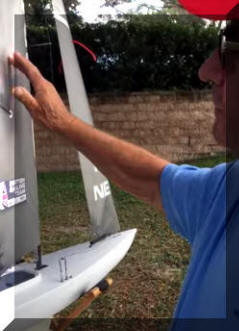 |
| Alan reviews his build of a prototype kit on YouTube. |
~ BUILD SUGGESTIONS ~
SAIL SERVO: "Standard" size servos fit the opening in the crossmember. The opening can be enlarged for other sizes. Waterproof programmable digital servos are wonderful and well worth their price tag, especially if you sail often. Experienced builders should discuss their favorite servos on the class website. If you are starting out and don't want to buy a waterproof programmable digital sail servo, try a GoBilda Torque model from Servocity.com. Built for robotics, it has steel gears, 300 oz-in of torque at 6.0 volts and a 2500ma stall current. It is not waterproof. If it gets wet inside, it could malfunction or die. It is reasonably priced and will get you started. It is being used in the 2025 New Hampshire Boat Museum's Model Yacht Building Workshop. This is not an endorsement by either Vac-U-Boat or the NH Boat Museum's Workshop. It is just making you aware of an alternate-hobby (robotics) source for a quality economical sail servo powerful enough to handle the Vac-U-Soling. In the crossmember photos on this page, my transmitter endpoints are adjusted to about 80% in each direction to keep the sail servo arms from hitting the king post. The arm in the photos is 6 inches long and 1/2 inch wide. I will probably make my next one 6.5 inches long. A 7-inch arm will fit in the hull with about 1/8 inch to spare on either side.
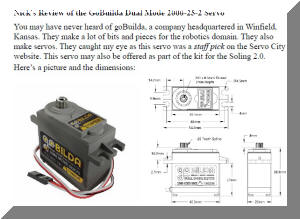
Read about the GoBilda Torque model servo at https://www.servocity.com/2000-series-dual-mode-servo-25-2/ or click the photo below.
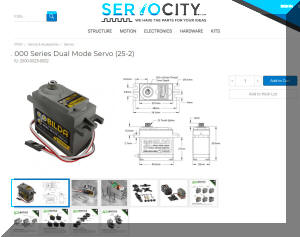
Click the image below for a GoBilda Servo Review, on this site with permission by Nick.
~ SEALANT, GLUE & TOOLS NEEDED ~
This kit is a little unconventional in its materials and construction. Here is some discussion that may help explain the recommended tools and glue.
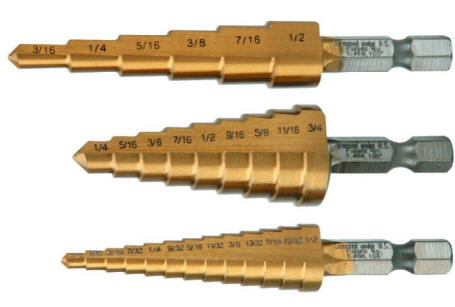
From the instructions: "To build this you will need: A 50-pack of wooden clothespins (more if you want to laminate the hull and deck on the same day), talc-cornstarch-microspheres (your favorite epoxy filler), 2 pumps of West Systems 105 epoxy with 206 hardener or similar product (Ask if you don’t have access to West-Systems epoxy.), 30-minute set (or longer) epoxy glue (Devcon 2-Ton at Ace Hardware), one caulking tube of Loctite PL S40 polyurethane window, door & siding sealant and paper towels. Tools you may need include a box cutter, 1/16” drill, 5/64” drill, 7/64” drill, a step drill set (allow you to drill large holes in plastic without splitting), wrenches, screwdrivers, drill, an old bath towel, plastic gloves, mixing cup & sticks, alcohol (for cleaning up epoxy), mineral spirits (for cleaning up polyurethane sealant) and you will need to borrow five 15oz. cans of vegetables from the pantry."
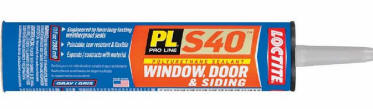
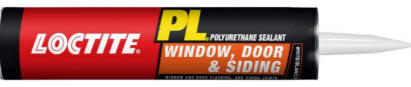
Polyurethane Sealant. The windshield of your car is glued with polyurethane sealant. The stuff is strong yet remains flexible indefinitely. It absorbs impact giving you a deck-to-hull seam that is as flexible and waterproof. Loctite PL Polyurethane Window & Door Sealant is a white sealant that bonds to scuffed/sanded High Impact Polystyrene permanently. A caulking tube is enough for the deck/hull seam and other hull bits of 5 boats. If you live near the ocean, your Home Depot or Lowes may stock a below-waterline Marine version. Similar polyurethane sealants are used on full size boats such as 3M's 5200. The original 5200 sealant cures too slow for the Vac-U-Soling. However the FastCure 5200 will do fine. There are other similar products available. I recommend the Loctite Polyurethane Window & Door Sealant because it works, it is economical and cures fast enough for this kit. When you are done you can take the rest of the tube and touch-up the cracks around your windows & doors. After using it, wrap & seal the tube tip with metal aluminum tape to get a few weeks of storage time for the remaining caulk in the tube. Otherwise, it will harden in a few days.
 |
 |
 |
 |
| Loctite PL S40 like this in some stores. | The latest new packaging for 2021. | Marine version 10oz. caulking tube or 3 ounce pkg. | 3M Fast Cure 5200 3oz pkg. |
West Systems 105 epoxy with 206 hardener. A proven quality thin laminating epoxy. Good physical bond with HIPS High Impact Polystyrene as long as you sand the HIPS first. Expensive and sold by the quart, gallon, or pail. Until a better product comes along, I'll make small "2-pump" kits available so you won't have to spend $80 just for epoxy. You may have found the perfect substitute laminating epoxy. Post your findings on the Soling1M forum at http://www.soling1m.com/forum/ .
Devcon 30-Minute epoxy. Good for everything else. Good working time. Waterproof. Economical. Available everywhere.
Step Drills. You really need to try these if you work with thin sheets of just about anything and want to drill holes without the drill bits ripping & tearing through the product. The three pack available at Harbor Freight is just fine. Use a sharpie to mark your diameter on the drill and drill to the mark. Remove the mark with alcohol. Use the slow speed range on your drill. They are best for staying centered on a locator dimple and great for enlarging an existing hole.
 |
Clothespins. They work and you can get a hundred of them at Walmart for $2.00.
Cans of vegetables. Great weights that don't cost anything to borrow. Just be sure to return them to the pantry.
~ MASTS & RIGGING ~
These manufacturers have quality rigging and accessories to get you sailing. This contact information is provided to assist you. Vac-U-Boat receives nothing from these vendors for providing this contact or service information. Vac-U-Boat provides no warranty for, or endorsement of their services. Do your homework. Get advice from your group. Make good decisions.
Click on the image for more information.
 |
 |
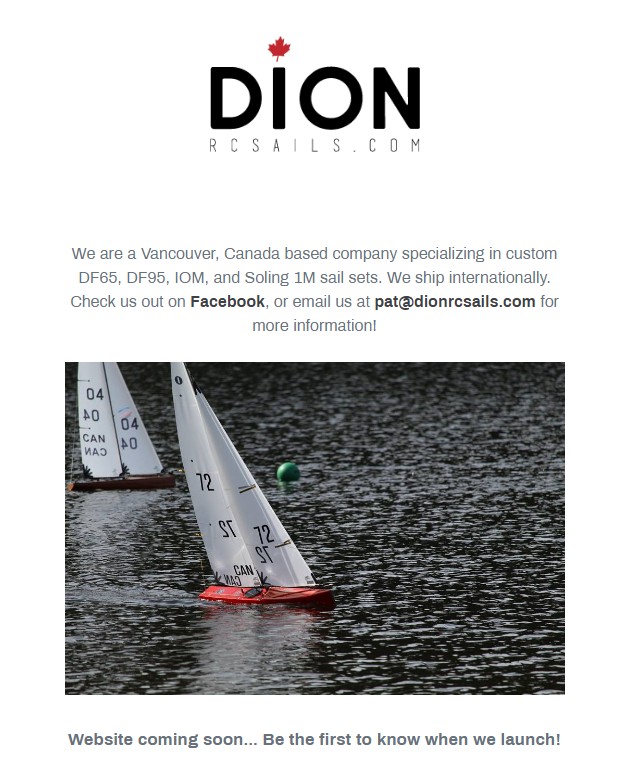 |
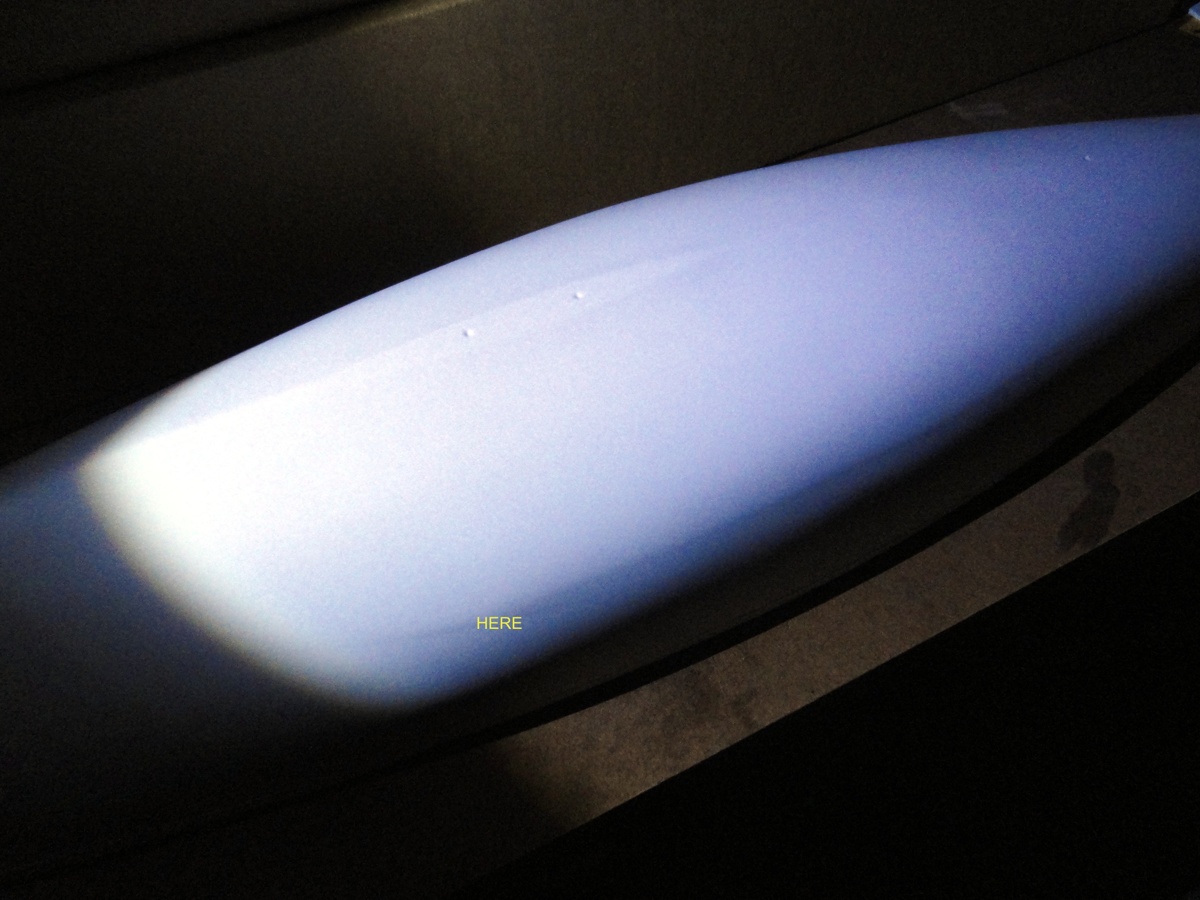
~ WHAT TO EXPECT WITH A VACUUM-FORMED PLASTIC HULL ~
Vacuum-forming plastic doesn't have the precision of injection-molded parts. This can be overcome with thoughtful mold design and attention to the vacuum-forming process. Artifacts can appear on the parts such as bridging over some details in the mold leaving a finished part that has a less-sharp appearance than the mold due to the thickness of the plastic sheet. On a hobby-level, such artifacts may be unavoidable. With very tall mold plugs, the sheet of hot plastic comes down onto the plug and vacuum is applied to pull the sheet tight against the mold plug forming the desired part. As the sheet comes down, plastic will touch the taller parts of the mold plug and be cooled by that touch. When vacuum is applied to draw and stretch the sheet of hot plastic against the shape of the mold plug, those areas that touched may not stretch as much as the parts of the sheet that didn't touch the mold before vacuum was applied. On a tall smooth surface like a boat hull, there may be a visible change in thickness, a transition line between the contact area and the rest of the hull.
The Vac-U-Soling hull will have such a transition line on the hull, more pronounced on the starboard side due to the design of the vacuum-forming machine. Side-lit, it looks like a shadow or ripple in the hull. It is only visible on the outside of the hull. The inside will be smooth. The transition marks the change in thickness of the plastic. The plastic closer to the keel is thicker than the area closer to the deck. It is more pronounced than the transition lines on vintage Soling1M hulls due to the different plastic used and the higher vacuum needed to form the Vac-U-Soling hull incorporating the transom into the hull. If you hold it up to a bright light and look through the plastic, the darker areas are thicker and the lighter areas are thinner. The drop-off in thickness is the visible transition line.
The transition line is mostly visible when the hull is upside-down and light is coming from overhead. Right side up, no shadow is cast so it is not obvious. The builds shown on this page have transition lines but they aren't readily visible and don't show up in the photos. There are reports that it can be improved by careful sanding of the thicker side to widen the transition area making it cast less of a shadow. That requires some sanding skill and an assortment of sandpaper in the 800 to 2000 grit range. In my opinion (ASE Certified Master Rep/Refinish Technician - Retired) there is a greater chance that sanding may leave noticeable surface texture or scratches visible from any angle. I would expect no practical effect on the hydrodynamic properties of the hull because it is only a few thousands of an inch difference and the flow of water follows the curve of the transition.
The vintage hulls had the same transition line, although a
little less noticeable mostly due to the properties of ABS plastic verses HIPS
plastic and the higher vacuum used to form the Vac-U-Soling hulls. ABS plastic
has more tensile strength when hot causing the transition line to stretch wider,
casting less of a shadow when cooled.
| Mold transition line on a Vac-U-Soling hull. | Mold transition line on a vintage Soling1M hull. |
 |
 |
~ QUESTIONS & ANSWERS ~
| I am now painting and would like your recommendation about painting the keel and rudder. Would you recommend it and is it necessary? | Without painting, the off-white plastic keel & rudder will begin to yellow with exposure to the sun. Plus oil or other lake muck will stain them. I’d recommend painting. No hurry though. Remove both from the boat to paint them. Clean with alcohol and/or soap & water to remove any mold release. If masking tape won’t stick to them, then there is still mold release present. Scuff or sand with fine 400 - 800 paper to remove the gloss. Mask the threaded rods. Paint with any kind of enamel. The polyurethane resin is not sensitive to oil or lacquer based paints like the High Impact Polystyrene the hull and other bits are made from. |
| My servo arms hit the king post. The majority of boats here and ones I have observed locate the sail servo behind the keel box on Victor boats. | The Vac-U-Soling was designed to locate equipment as far forward as practical because the vintage model had a reputation of being stern-heavy. Eliminating the keel box opened up that forward area for the sail servo. The new internal structure of the Vac-U-Soling reduces the need for builder-added reinforcements. All of this results in it being a little less stern-heavy as compared to vintage Soling1M hulls. If your rigging doesn't use the precut servo locations in the standard crossmember, you can attach your custom servo board on top of the crossmember. The keel mounting bolts are taller than needed for the included fiberglass crossmember. Their height can accommodate adding a plywood servo board and the keel mounting nuts would hold it in place. Or, use the included servo screws & wrench to attach your servo board directly to the crossmember. The kingpost was necessary because bulkheads were eliminated. Avoid hitting the kingpost by dialing down the endpoints in your transmitter sail servo channel. A double ended sail arm with a shallow "W" profile can reach around the king post. In the build photos on this page the double-ended sail arm is 6 inches long by 1/2 inch wide. This was enough for good angles on the sails but my next one will be 6.5 inches so I'll have more than enough. There is room for a 7 inch arm. |
~ MAINTENANCE & REPAIR ~
Links to videos showing how to do stuff.
~ CUSTOMER COMMENTS ~


 |
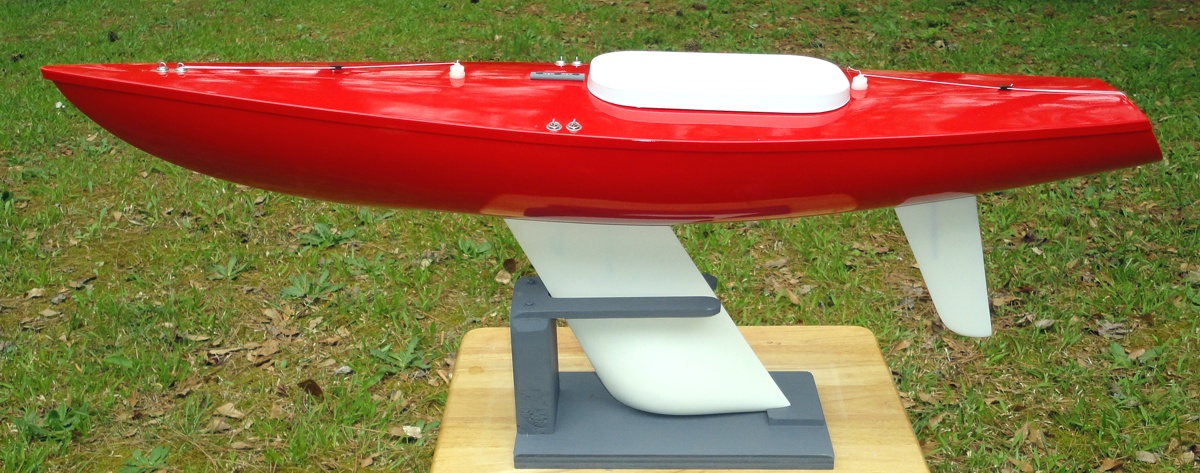
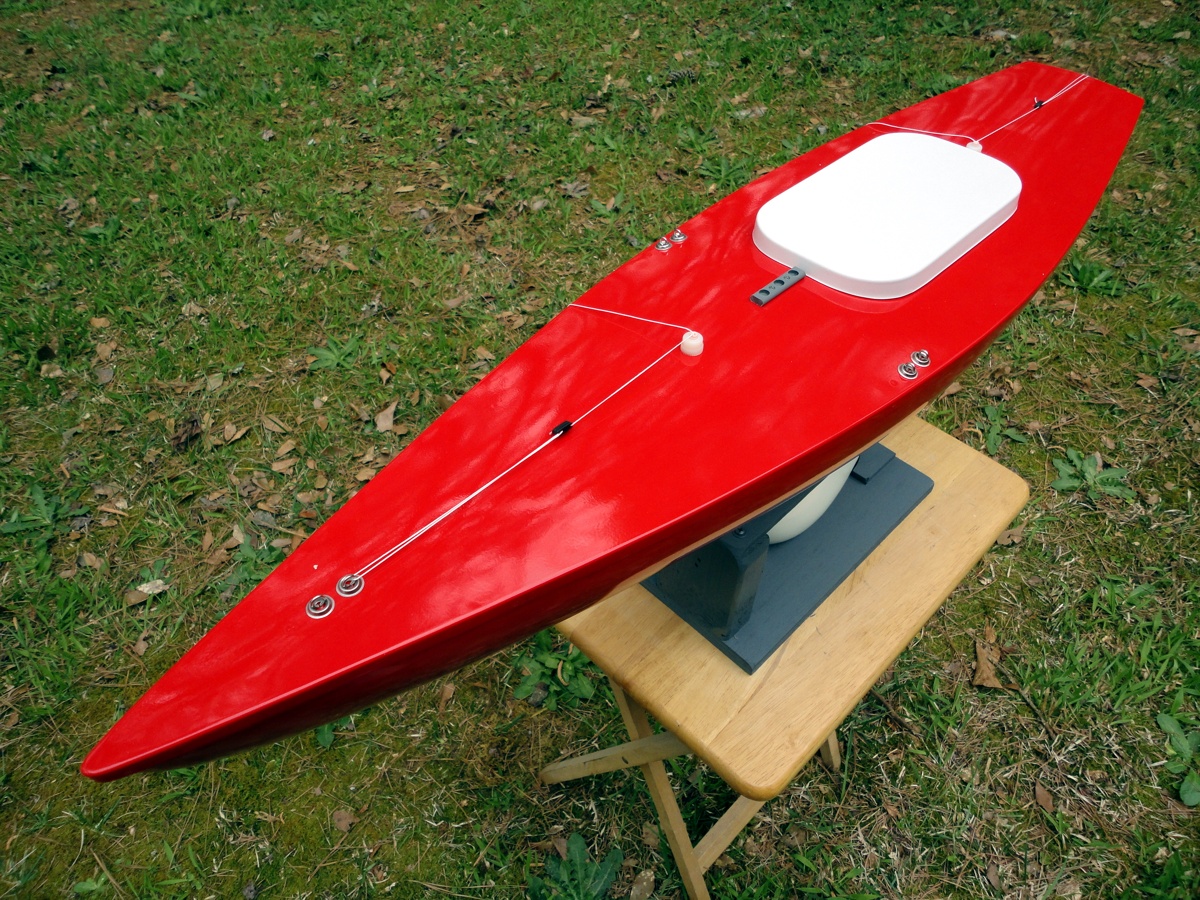
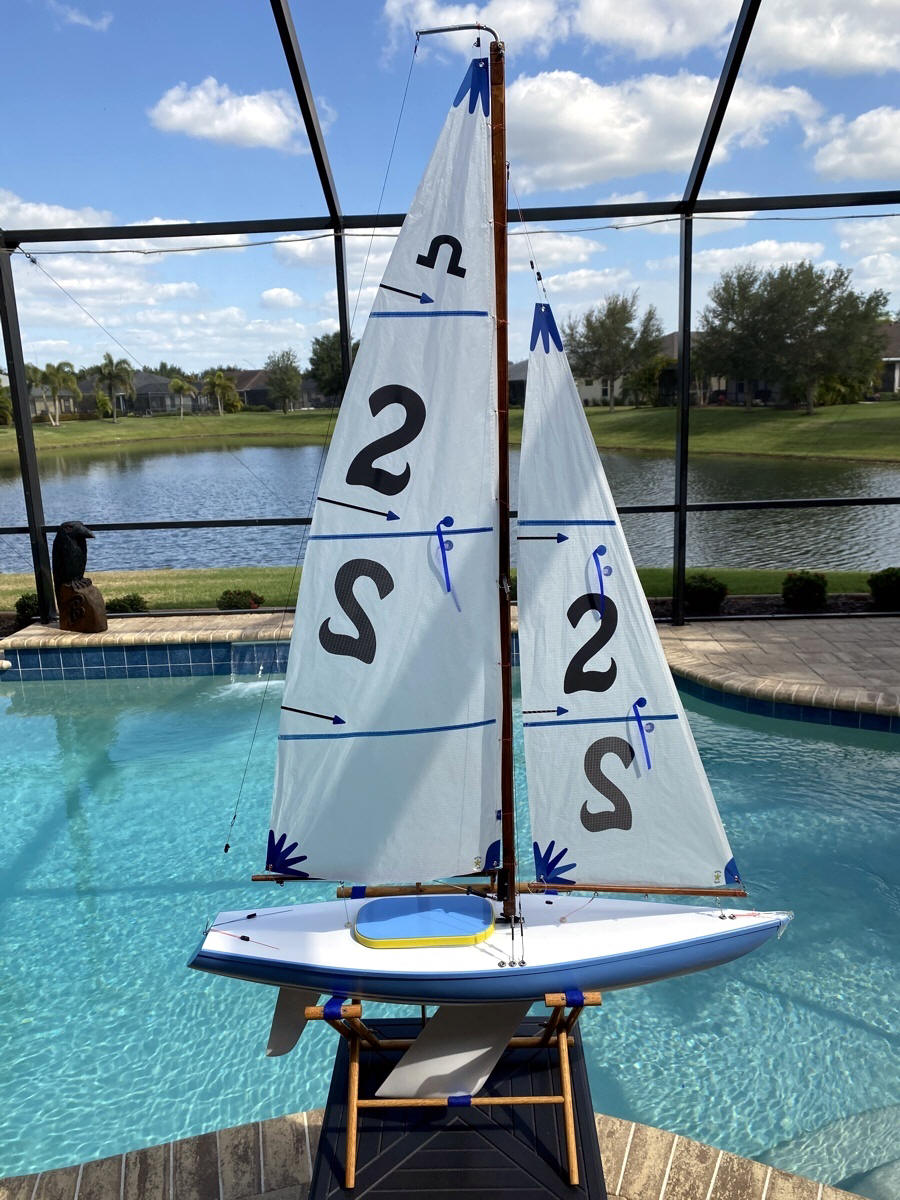
Hi Phil - I finally finished your soling kit. I am pleased with the way it finished up. Here are a few photos for your gallery. Will race her in Tiverton, RI next Tuesday. Many thanks, Paul |
|
Hello Phil! Greetings from the North West Coast! I am writing to say the Soling One Meter Kit arrived safely. It came Wed.,14th, three days later than expected. As I tracked it, I noted the Torrential rains in Georgia and the Horrible fires in Oregon. Would the package arrive soaked and singed? Alas, despite these challenges good old UPS came through. Excitedly, I opened the box and found it came through the journey unscathed. Everything was in good shape and all the parts were included. Thanks Phil for the professionally packed kit. I am looking forward to carefully building this magnificent model boat. Best wishes. Paul |
|
| This kit is awesome. Compared to the old kit, this was much easier to build. Everything went together per the instructions. Great job! - Scott | |
 |
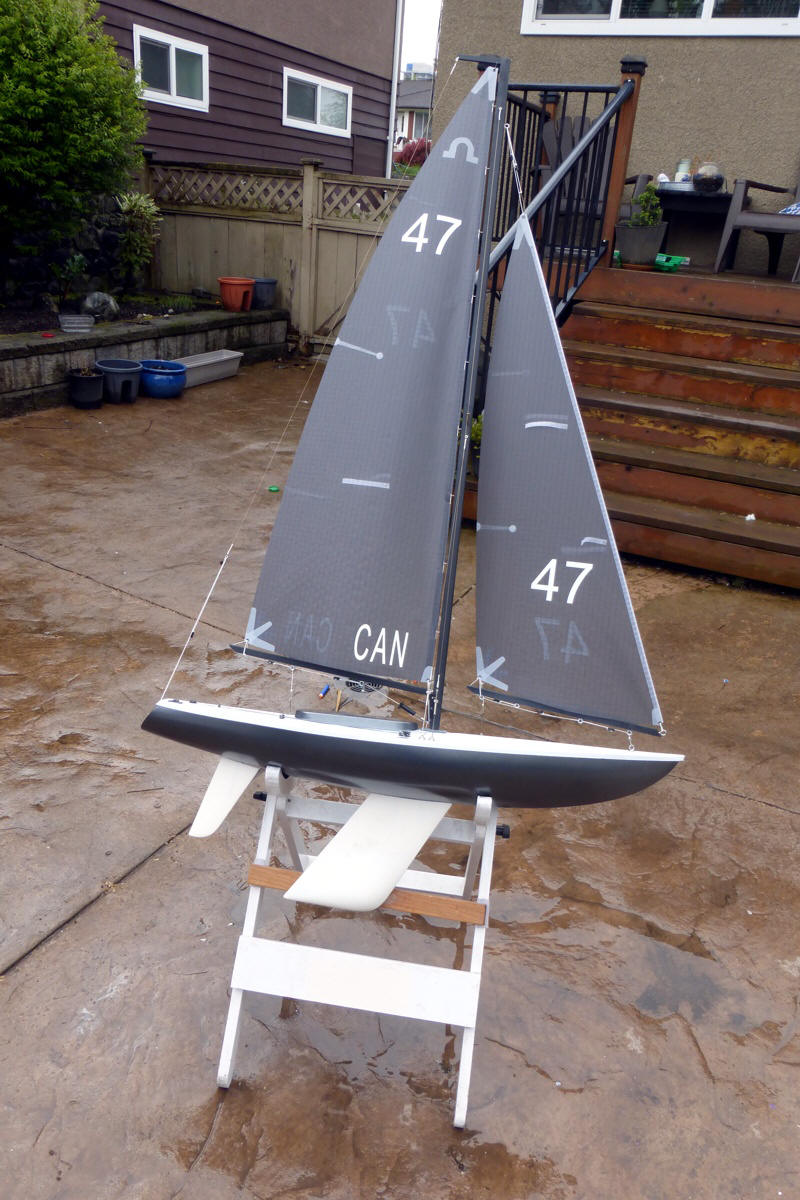
Beautiful Soling. As good as any, better than most. Final weight of
our Vac-U-Soling (with 6-3/4 lb keel, heavy rudder, electronics, and
battery) is 9 lbs, 7.6 oz… With the usual 8 oz rig it should weigh approximately 9.95 lb. That leaves room for a few tiny bits of lead for balancing, 10 lb, 1 oz… PERFECTO! On to the rig next week. —Jim |
  |
Phil, As a new member to building RC Sailboats, thanks so much for your detailed building instructions and all of your follow-up answers to all of my questions. I have joined a local club and find them a valuable asset as well. Congratulations on your design, well thought out and find it delivered great results. Thanks again, Clare |
| I love the design of your boat, job well done!!! Don | |
|
Hello, I just finished assembling my Soling. With your pictures and directions, things went more smoothly than I could hope. Jack. |
|
| I did have to make a servo tray after a test sail due to the spot in the cross member tray puts the sail servo with double arms too far forward. My servo arms hit the king post. The majority of boats here and ones I have observed locate the sail servo behind the keel box on Victor boats. I also raised my servo up so the ends of the sail servo arms did not pull upward toward the under deck Fairleads. These comments are made about those boats using a double arm arrangement. BTW my boat using the 6 lb 13 1/2 Oz keel still weighed 10 lb 4 Oz. The build was still a pleasure. L. | |
  |
Vac-U-Boat! First time out today! Excellent Day! Very Happy with its performance, no leaks, made a couple boo boos along the way, but, my errors! Fit and finish was excellent, all parts fit, keel and rudder perfect alignment, looking forward to my 2nd build! Thank You, A lot of thought and engineering went into this kit! John |
| I received the boat Tuesday and it was perfect. I am building mine and it is a pleasure to build this kit. The hardware items are great and fit perfect. Thanks | |
      |
Had a good day got most of the build done. Need to glue deck down and paint. Well done. The boat build is not hard. Instructions are good. Talk soon. I finished the build. The boat weight 10.2 LBS. Not bad. I used more deck parts. I have a winch setup, not an arm. Can't wait to sail it. Hi, I think you have done a great job on this kit. The only thing I might change is the location of the battery and its platform. I moved mine aft of the servo tray. My hands are large and I have a hard time placing and getting the battery in and out. Not a big deal. Here is a new photo with the boat painted. Pat <The battery tray also fits the other end of the hull liner near the rudder servo mount, if you want to put it there.Phil> I sailed the boat yesterday. It sailed great. It sat on its lines perfectly. I had lots of good comments about it. A good friend of mine Allan, an IOM sailor like it so much said he is going to order one this morning. Some of the fellow Soling sailors on the facebook page have asked me to post some photos on my Sail winch set up and how I rigged it so here are the Photos. <Note the crossmember was rotated 180 degrees to put the rudder servo on the left and the winch lines on the right. This is fine and does not affect the construction because the crossmember is symmetrical. Phil> |
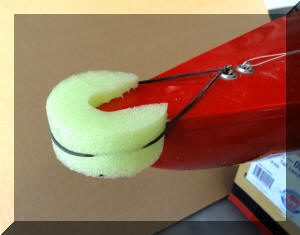
Click this for a PRACTICALLY FREE BOW BUMPER.