Vac-U-Vee Jr.™
20" Deep Vee RC Boat Hull Kit
Flex ShaftBuild Page
Click on the photo to enlarge.
Kit assembled with filled 30-minute Epoxy. Other adhesives or sealants can be used.
Additional installation examples are shown on the Straight Shaft Build page where a polyurethane rubber sealant is used as an adhesive.
 |
 |
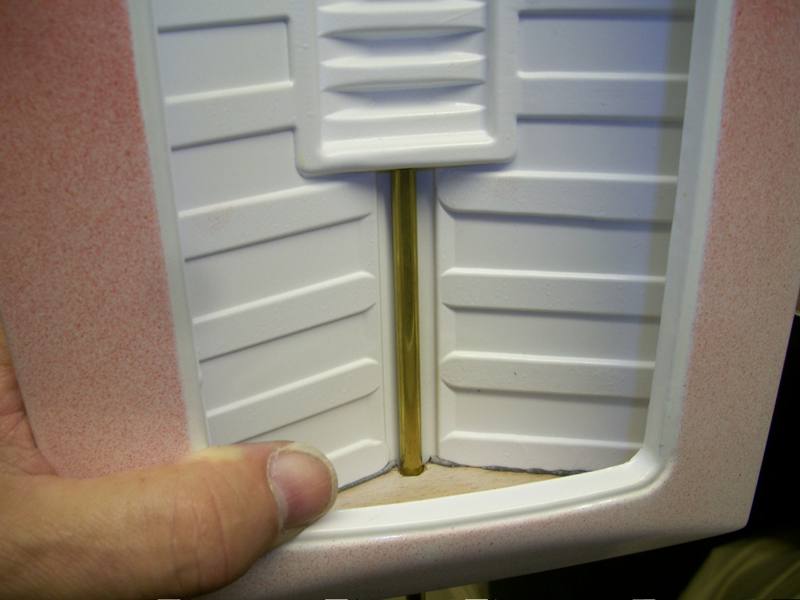 |
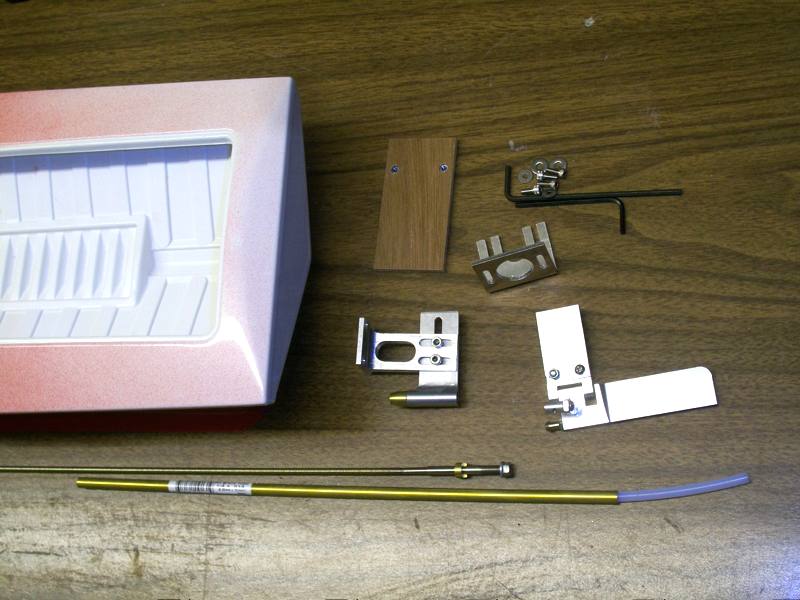
| Hughey-type flex drive and strut with a 95mm aluminum rudder. | Hole in the transom for the brass tube is at the bottom of the hull liner. | Test fit of the brass tube. Make sure it can sit straight without any binding. |
 |
 |
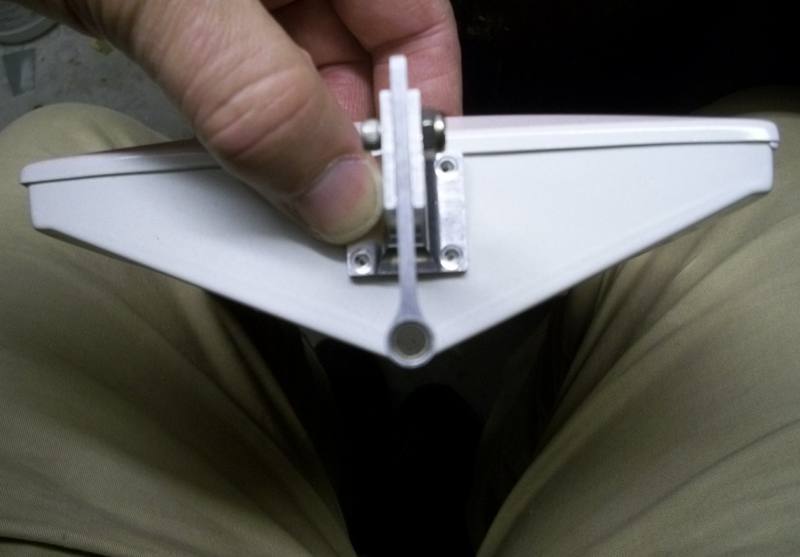 |
| The hole does not have to be perfect. Sand this area where you will be applying epoxy later. Sand the rear 2/3rds of the motor recess as well. Don't forget the inner sides of the recess. | Find and mark the center of the transom. | Center the strut, you can loosen the lower strut and align it to the shaft hole to be sure of a good fit & alignment. |
 |
 |
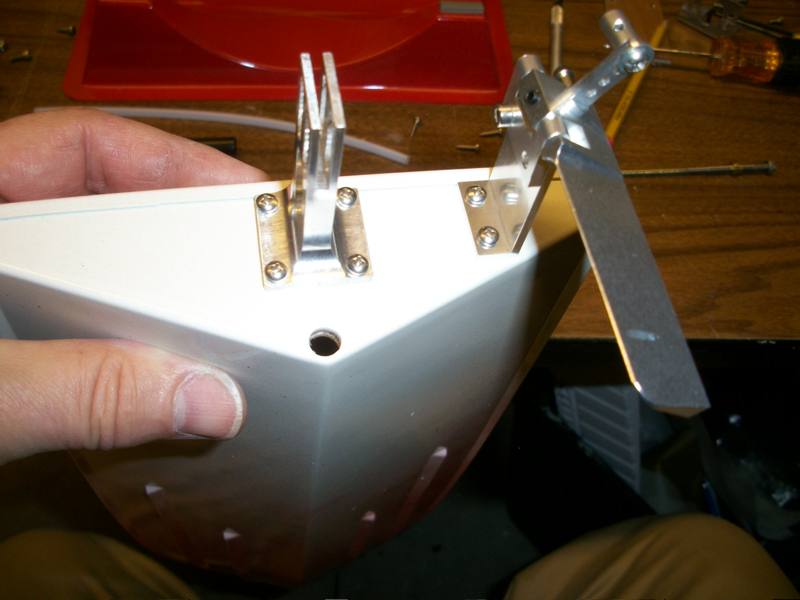 |
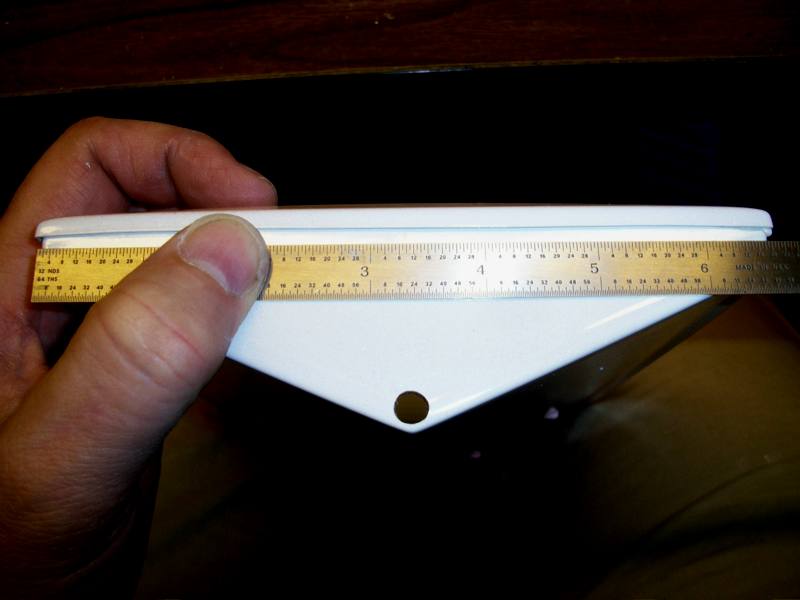
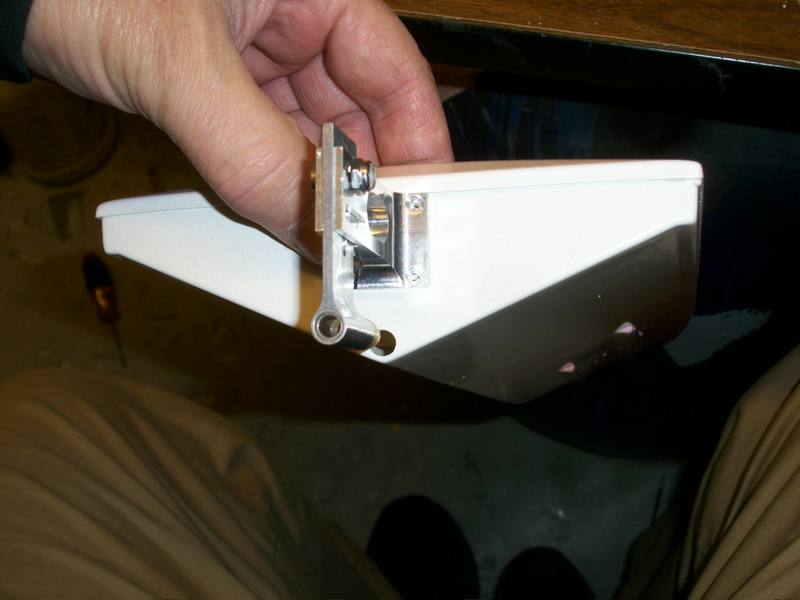
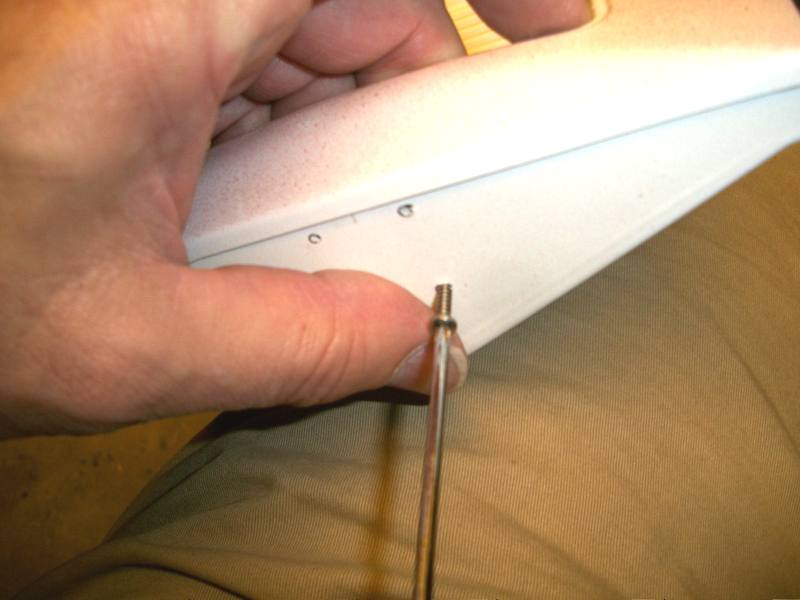
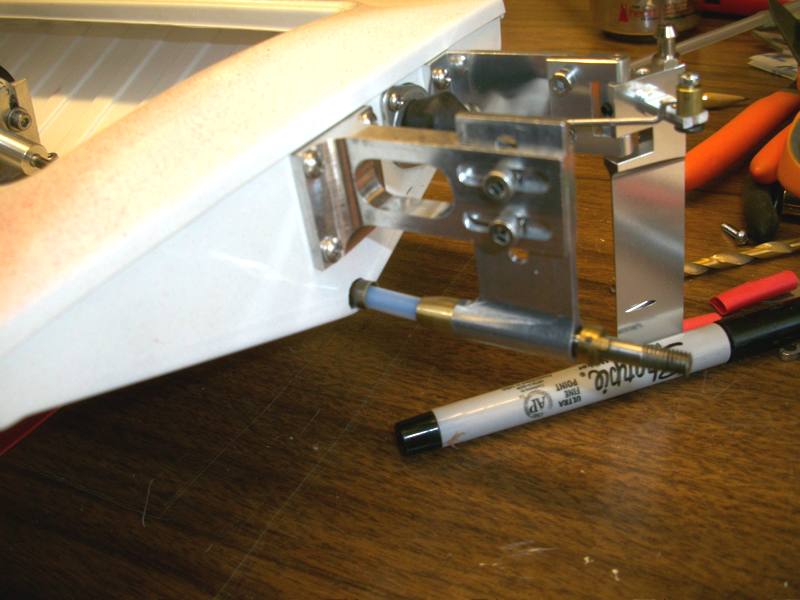
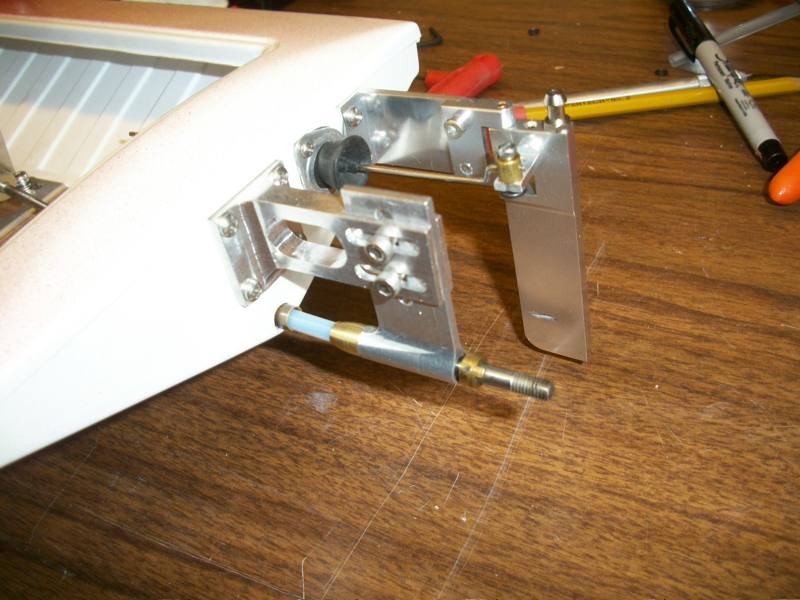
| Hold the strut with bracket in place and mark the 4 mounting holes. | Drill with the size bit needed for the screws that come with the purchased drive. | Install the rudder on the right, as far as it will go, centered under the deck lip, and above the bottom of the hull as shown. |
 |
 |
 |
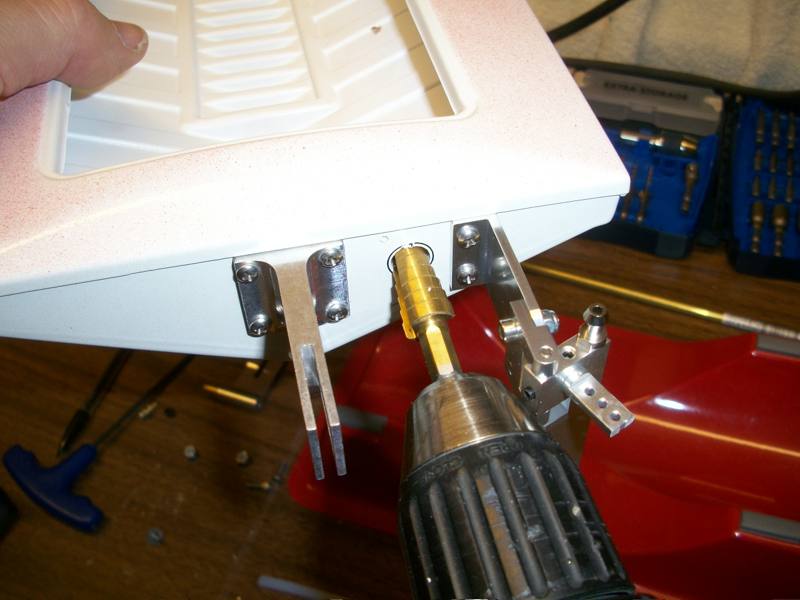
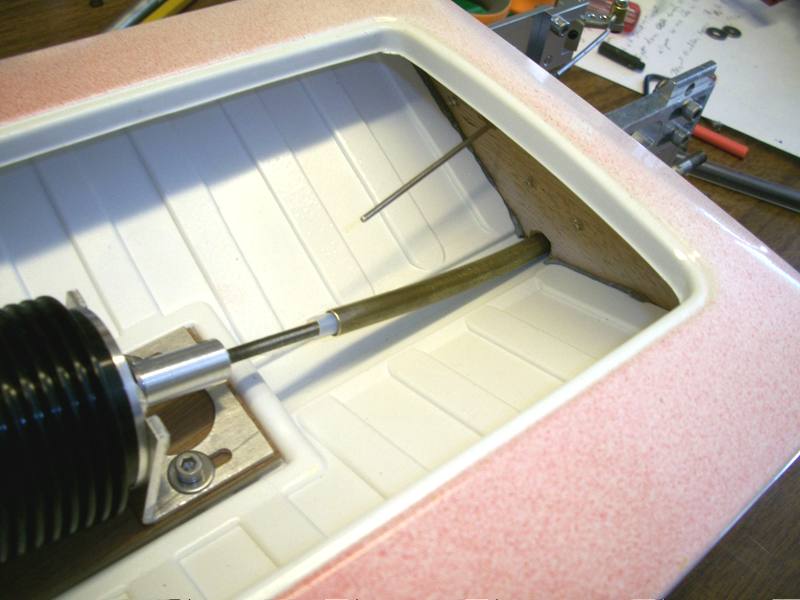
| Locate the hole for your rudder pushrod and use a step drill to make the large hole, or start with small drill sizes and work your way up. | With just the silicone rubber liner around the flex shaft, set the motor and shaft in place. You will have to cut the flex shaft to length. Here a straight 1/8" coupling is used with a 1/8" thrust bearing. A self-centering collet-type coupling is best. | Note the gap between the strut and the prop drive-dog. You want the prop thrust to be borne by the motor thrust bearing, not the drive dog against the strut housing. |
 |
 |
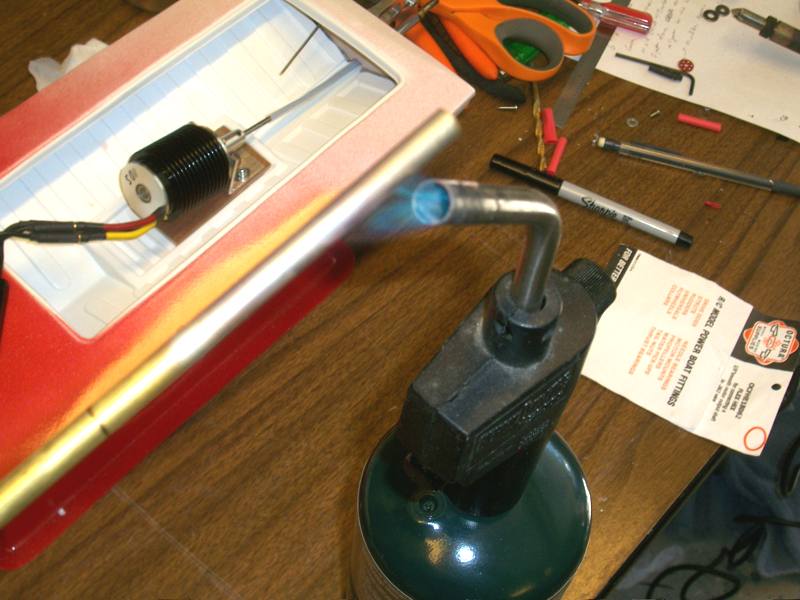 |
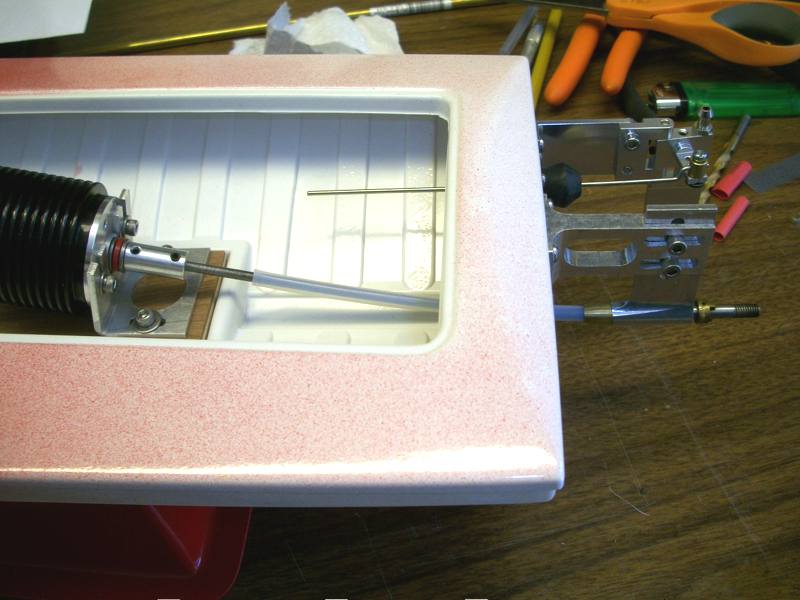
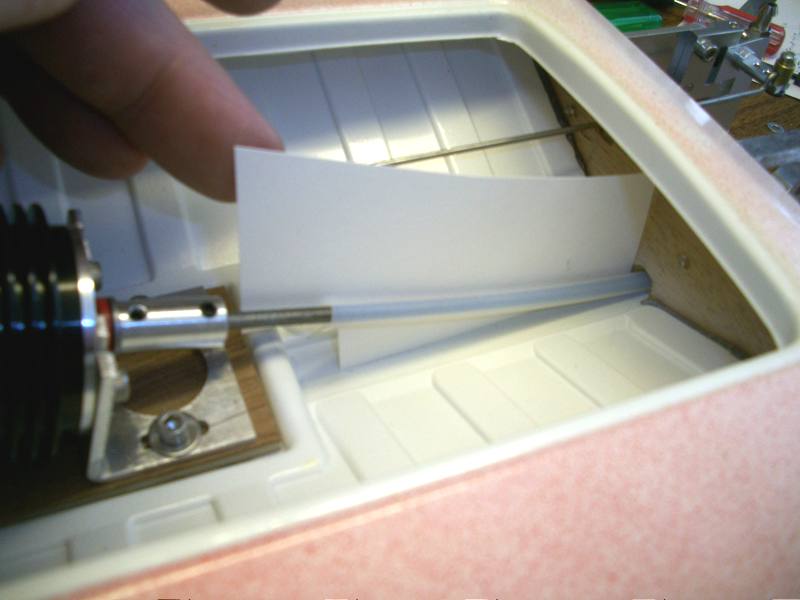
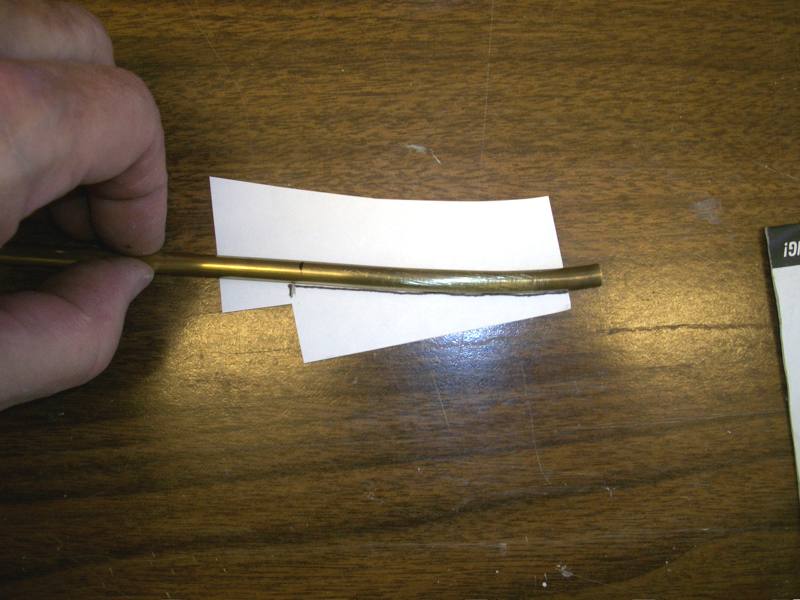
| The shaft and liner will flex naturally. Use a scrap of cardstock to mark that curve. | Curve of the shaft between the transom and the motor. | You can bend brass tube after it is heated cherry red, then quenched in water. Don't burn yourself.... |
 |
 |
 |
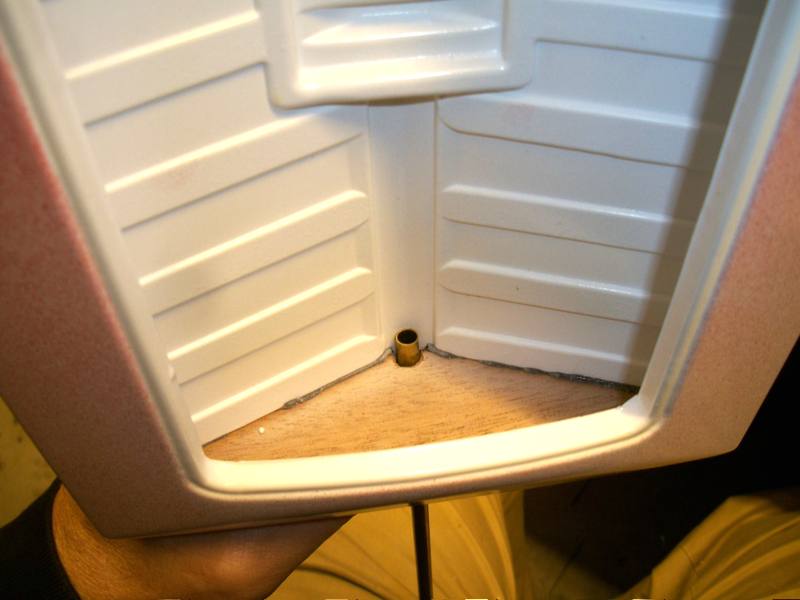
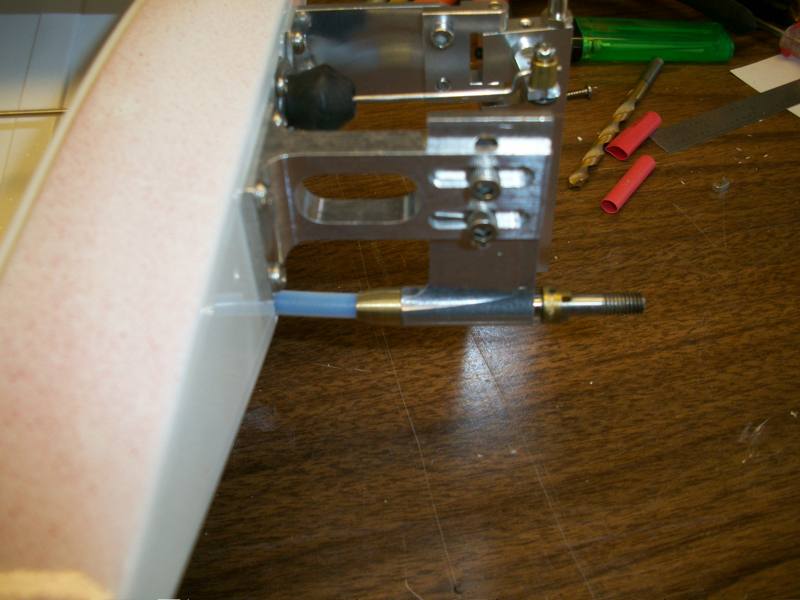
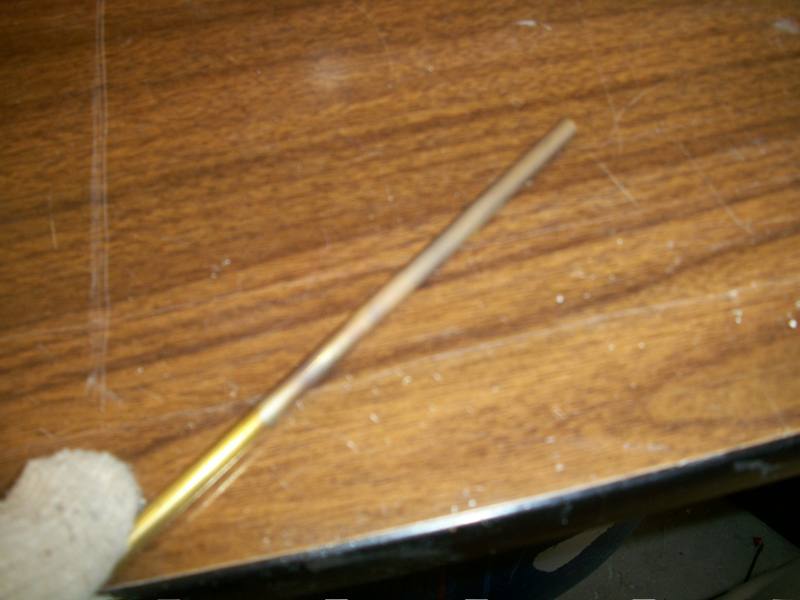
| The tube has been "annealed" by the previous process. | Carefully bend the soft tube to match the curve on your card. | Install the tube without only about 1/8" sticking out of the transom. Check for a non-binding fit. Here the motor and base are sitting at the rear-most position of the motor recess in the hull liner. |
 |
 |
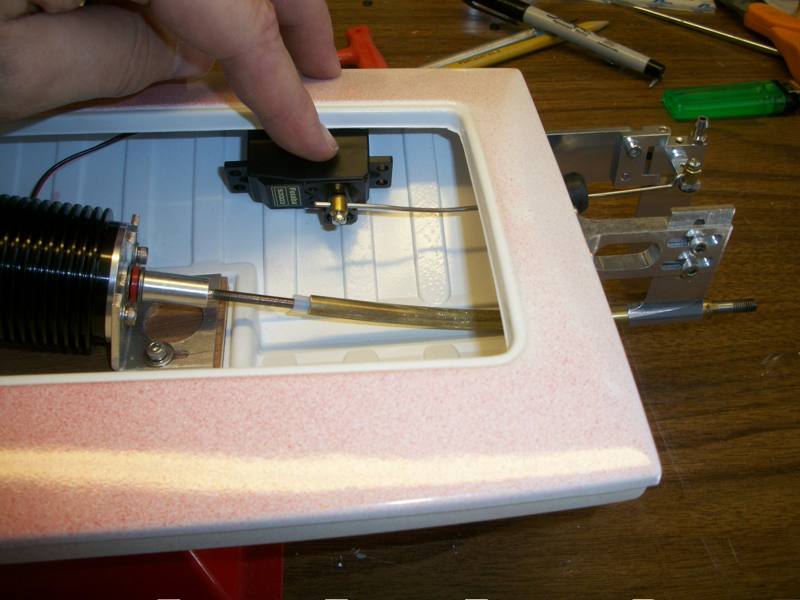 |
| The outside should look like this. | Install the rudder pushrod. Look at the "Straight Drive Installation" page to see how to CENTER your servo and trim the servo arm. | Locate the right spot for the servo so there is no binding and the pushrod is in the center of the hole in the transom. Mark this spot and sand the floor of the spot so the epoxy will stick properly. Score the motor tray recess as well. |
 |
 |
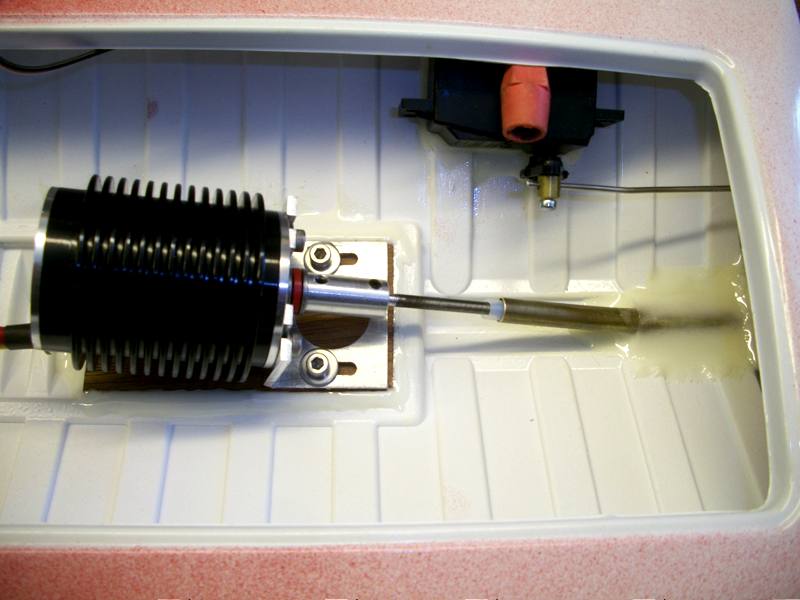 |
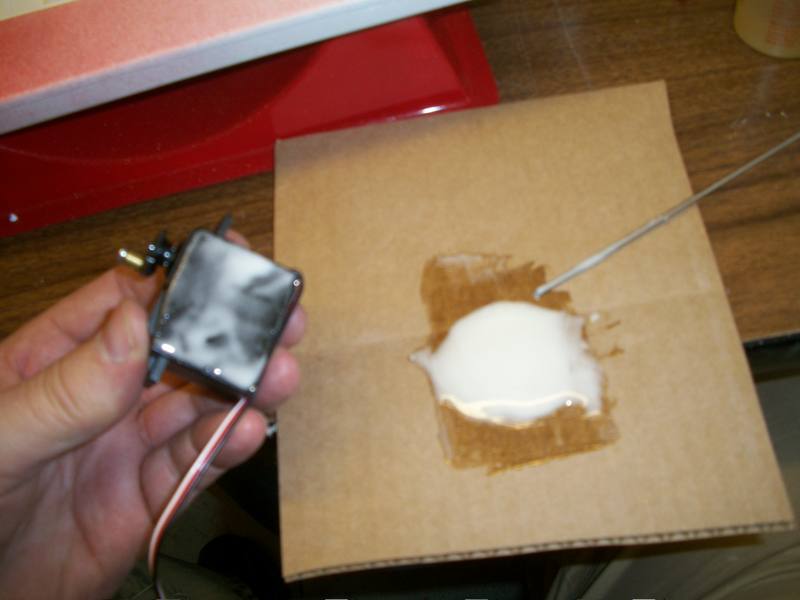
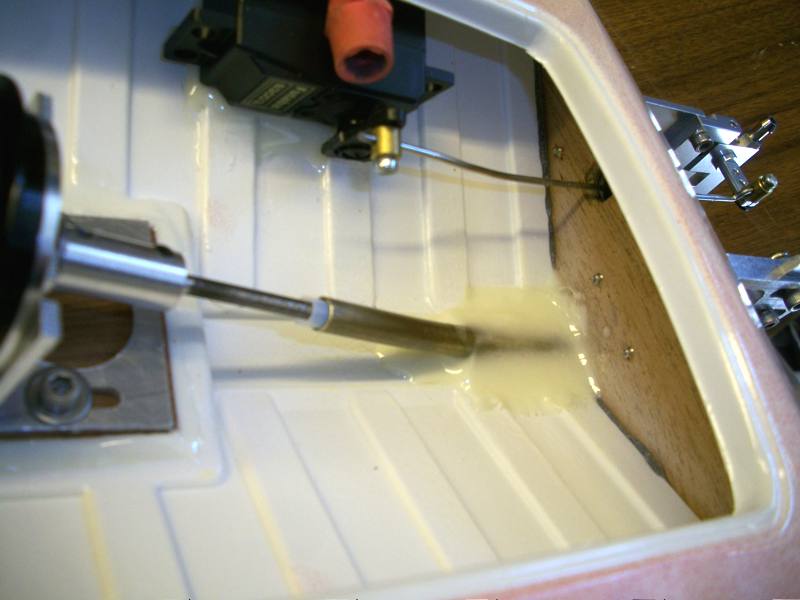
| Carefully score the bottom of the servo in 4 directions with a hobby knife and coarse sandpaper so the epoxy will stick to it. Mix 30 minute (2-ton Devcon) with filler (talcum powder used here.) and apply to the servo. Apply filled epoxy to the base of the motor and the hull recess as well. | Apply filled epoxy to the servo and to the stern tube. Here, I used an eraser to help hold the servo in place. Tape will also work well. | Set the motor into the recess. Add epoxy around the edges of the recess to help hold the motor in place. Set the boat on a folded towel or use the boat stand at an angle to keep the epoxy from running away before it cures. |
 |
 |
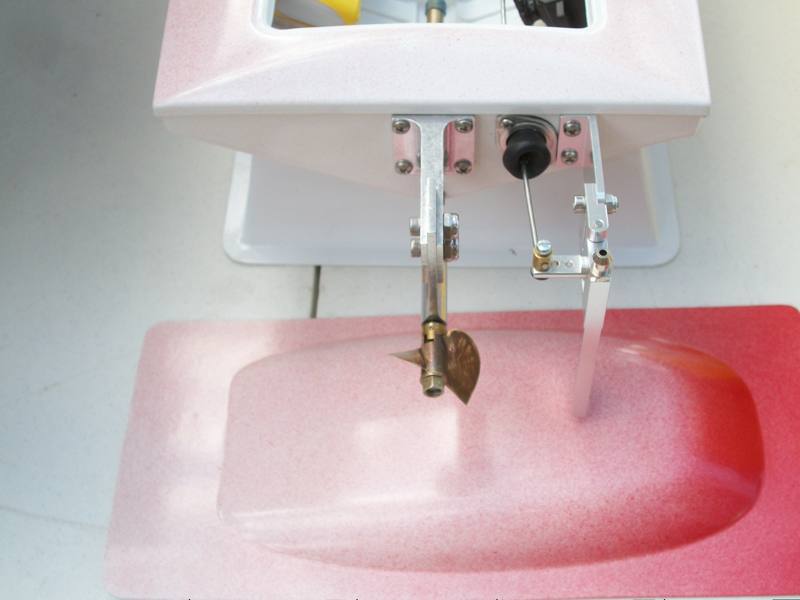 |
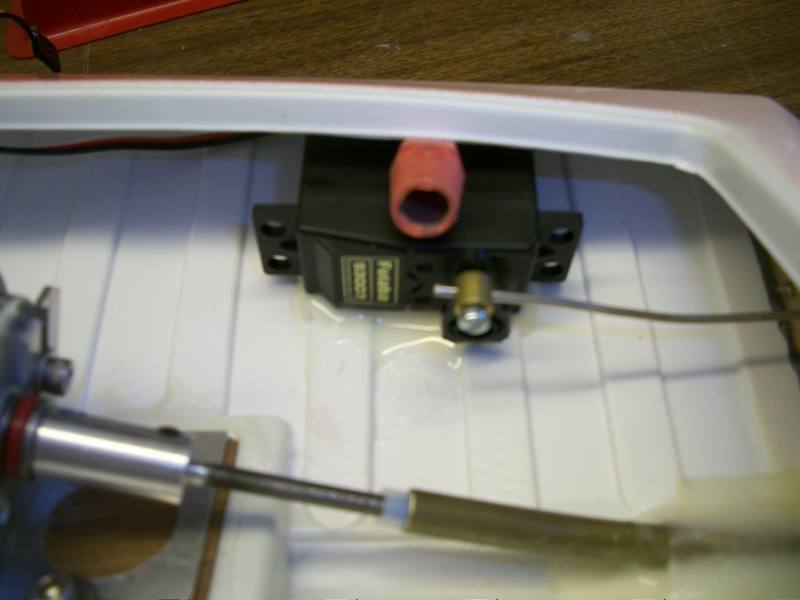
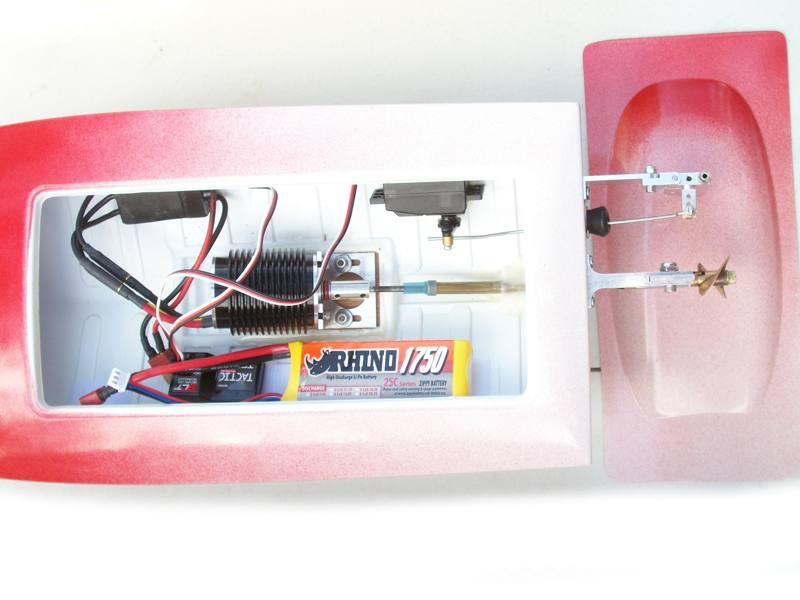
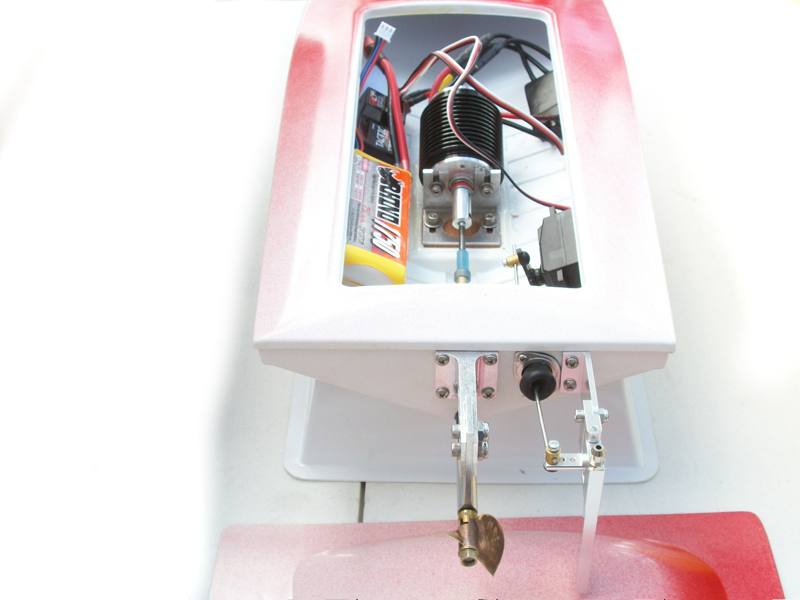
| Check to see that the rudder works without binding and that it doesn't slide out of position before the epoxy sets. | Typical finished installation.
|
Stern.
|
 |
||
| The battery can be moved around to adjust the center of gravity of the boat. Support the boat with one finger at the bow, and the second at the rear of the hatch opening centered on the rudder. Lift the boat to check for left-right balance. |
 TM
TM