Spray Painting the Vac-U-Tug
(With Hobby Enamels)
(Those short cans like Testors Spray Enamel®, Plasti-Kote Odds n' Ends®, or Krylon Short Cuts®.)
Practice first.
Stand a scrap of plastic on end. Practice spraying it with a light first coat, then a medium 2nd and medium 3rd coat (3rd if necessary to give good coverage) until you can paint it without drips or sags. Let each coat of paint "flash" or dry to the touch. Don't rush this. Each coat must feel dry before you apply another. Wait 5-10 minutes with the first coat. The 2nd coat may take 10-20 minutes. It is better to waste a can of paint practicing than to screw up the model by spraying it without practice.
Drips occur when you hold the nozzle too close to the hull as you spray, or if you stop moving the can (left to right) while spraying.
Sags are caused by not letting the prior coat flash properly (dry long enough) before recoating. The 2nd coat solvents cause the first coat to move, taking the 2nd coat with it.
| Put a small piece of tape over the Drive Dog at the Stern Tube (Thrust) Bearing. This prevents paint from gumming up the rotation of the prop. | 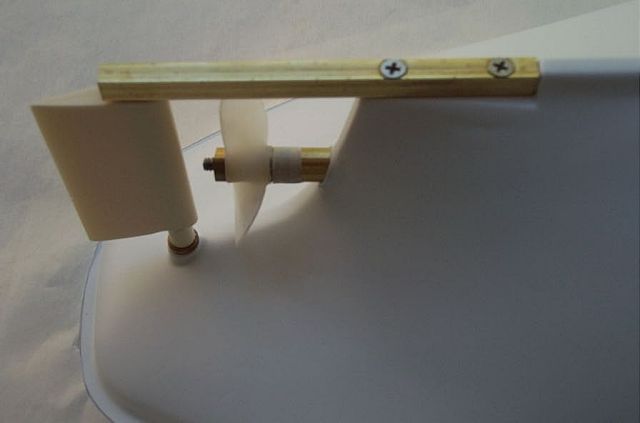 |
| Blow away the dust. Lightly wipe with a Tack Rag. (Rosin-impregnated gauze cloth available at most paint departments.) In hot weather don't press too hard or rosin may rub off onto the plastic hull. | 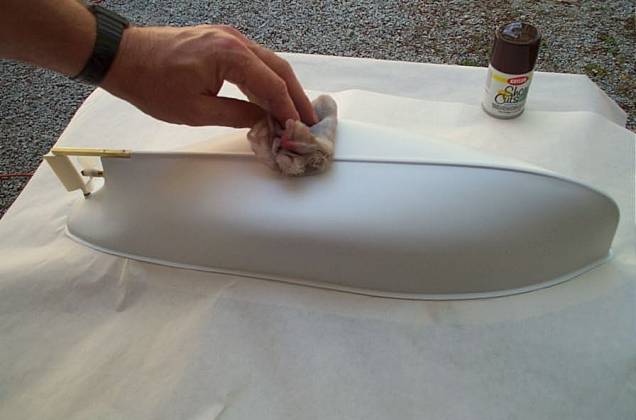 |
| Don't hold the spray can too close. This spray pattern, sprayed 5 inches from the spray nozzle, is too heavy at the center. | 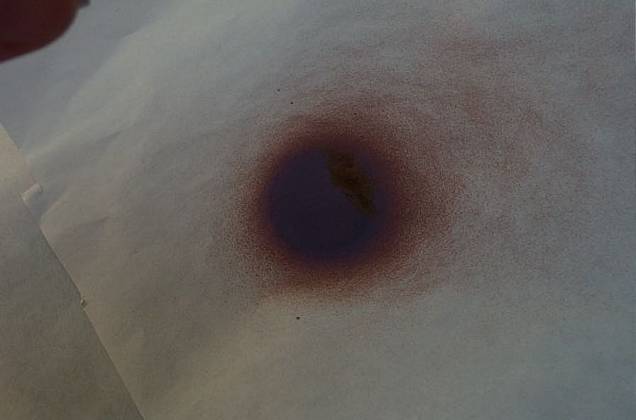 |
| At about 11 inches away, the pattern is more even in coverage. The first coat should be very light to avoid drips and sags. | 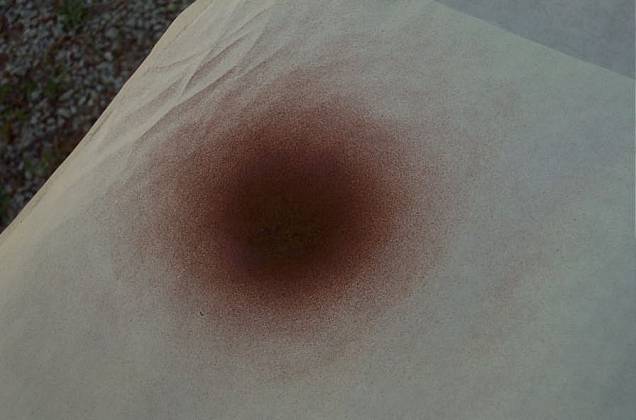 |
| Imagine the area you are spraying is a flat surface. Spray a pattern in overlapping rows left to right (or right to left) in order to evenly cover that shape. If the surface is curved, then curve your "stroke" keeping a constant distance from can to object. With experience, you can spray back and forth. However, you don't "zig-zag". Instead, spray straight across, move up (or down), then spray back across. Don't move too fast. Take about 1-1/2 to 2 seconds per pass. | 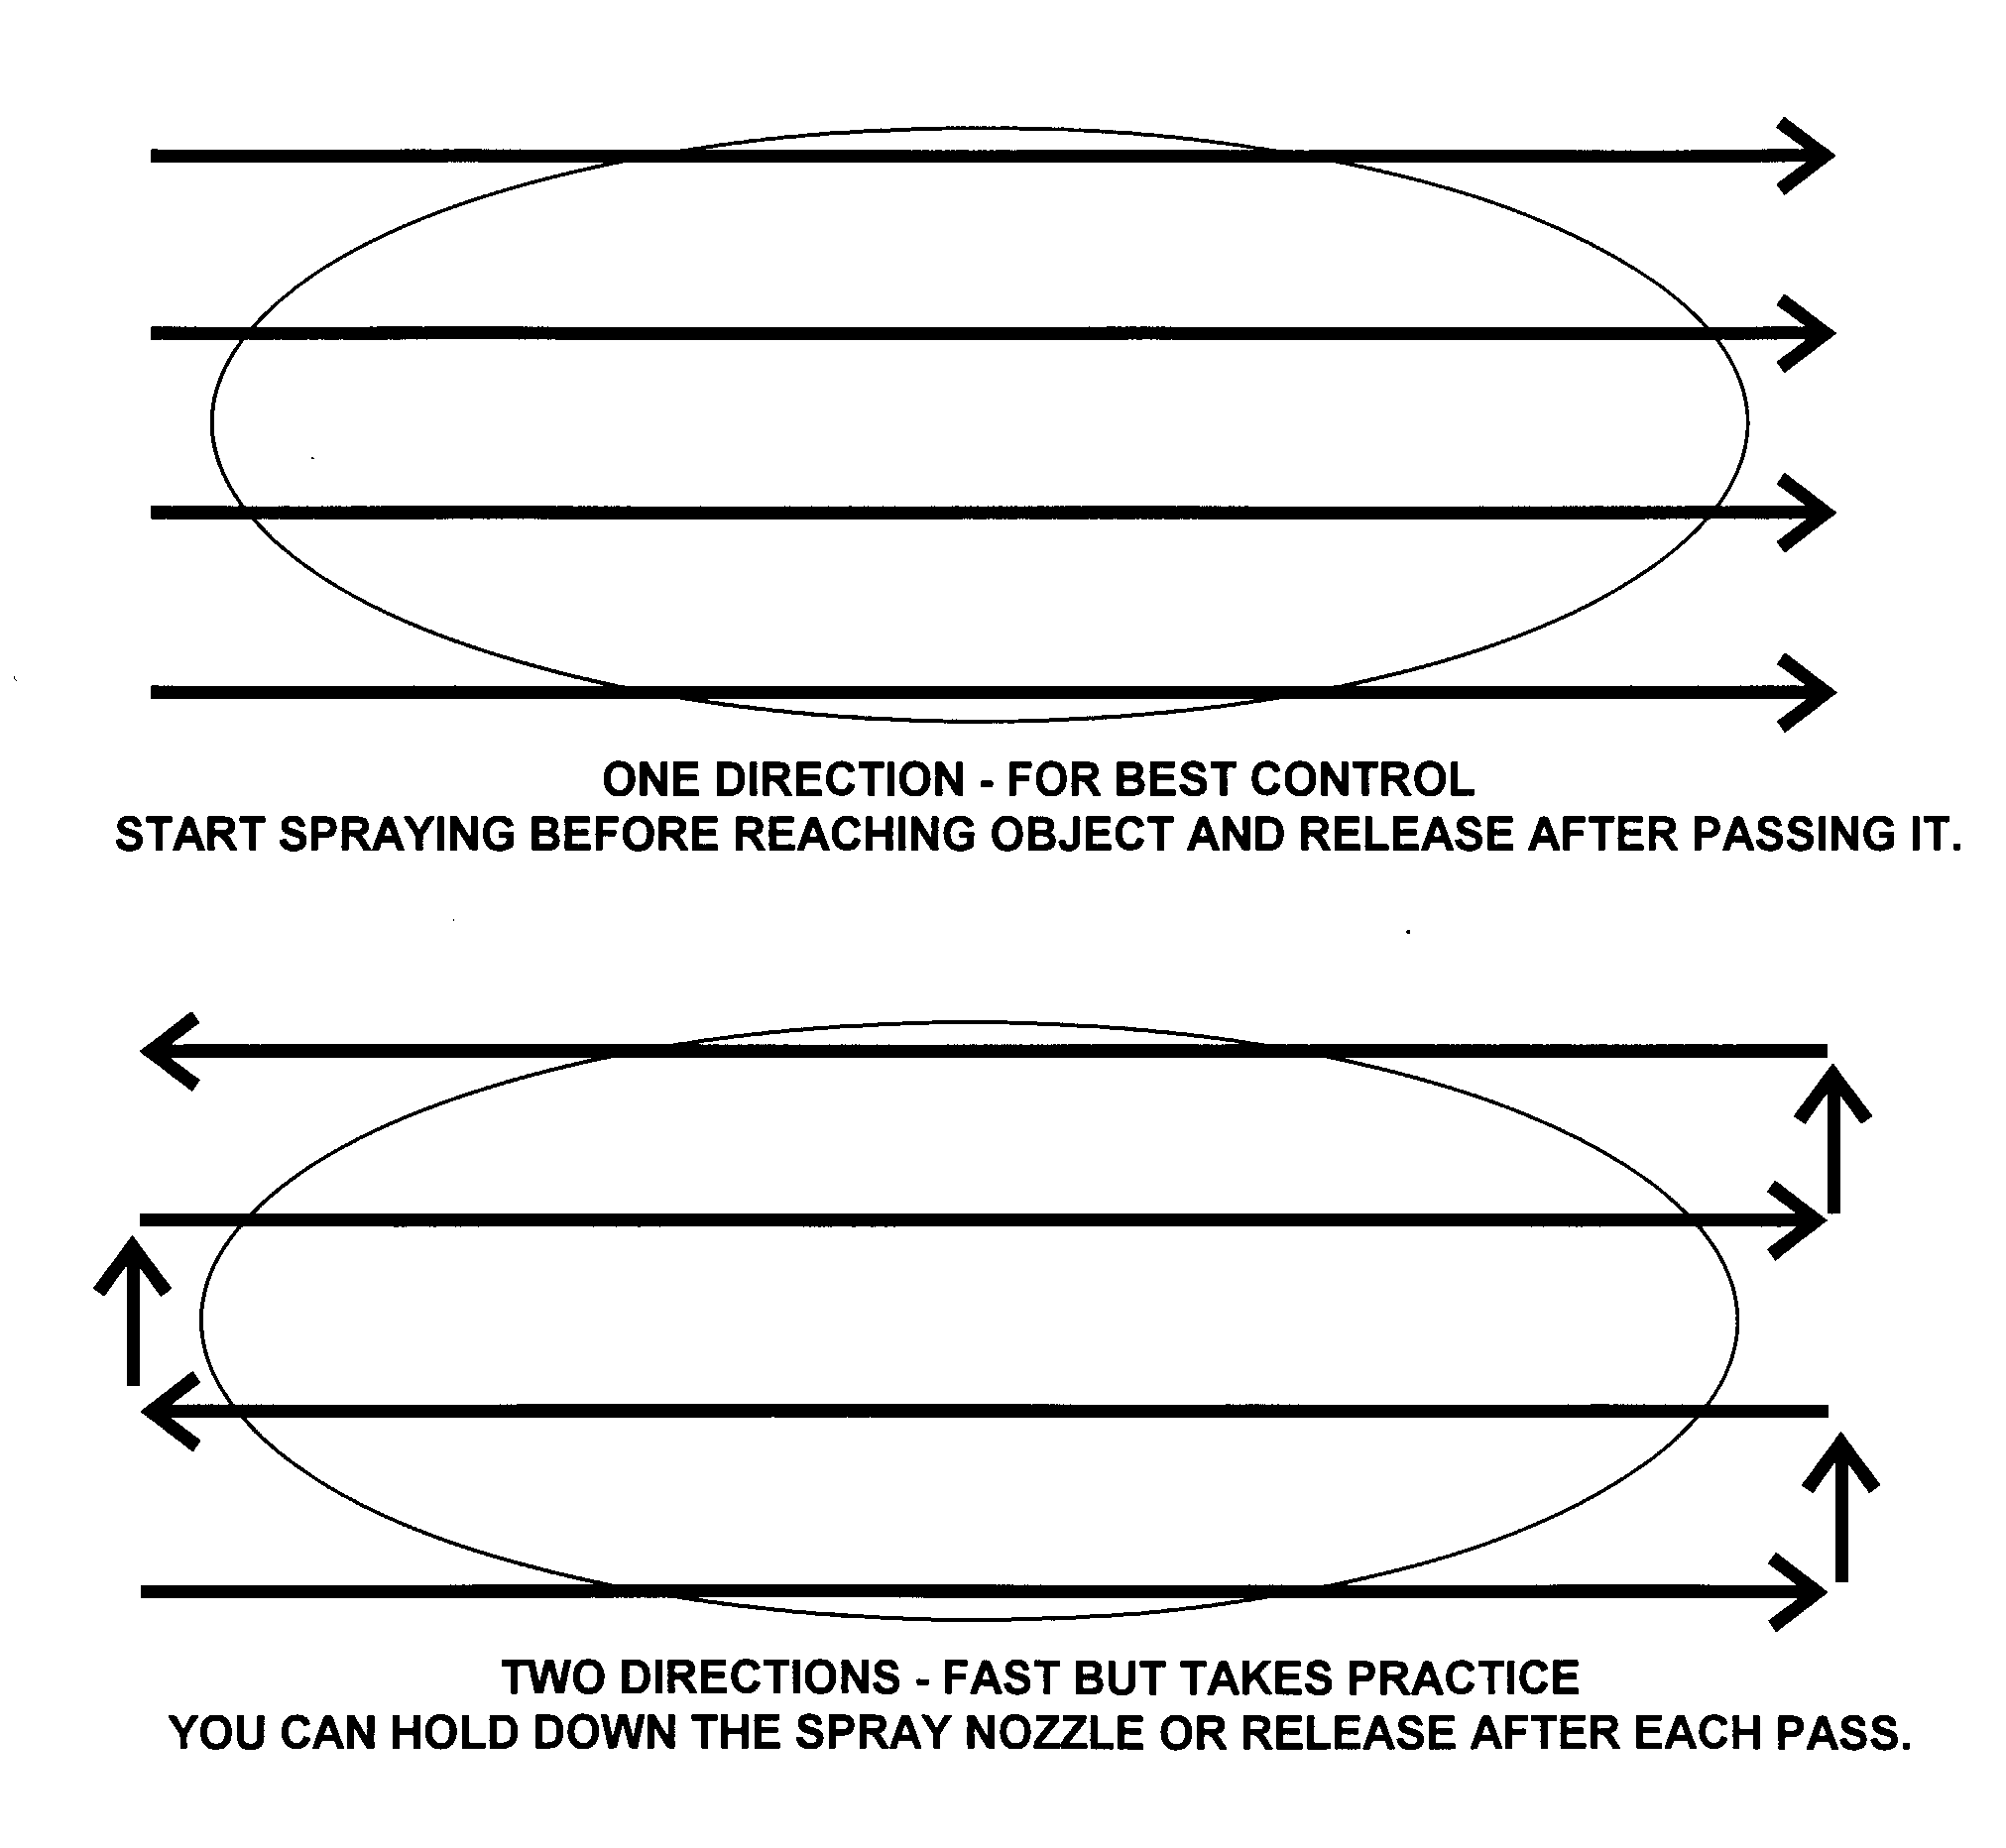 |
| Here, the near side has been sprayed. There are 5 sides to any object you paint. 4 sides and 1 top. Since you spray at a slight downward angle, painting 4 sides will usually cover most of the top portions. |  |
| The two sides have been sprayed. These rear end areas aren't covered by the side spray. Spray the stern end of the hull. Don't forget the area forward of the Prop, under the Skeg. | 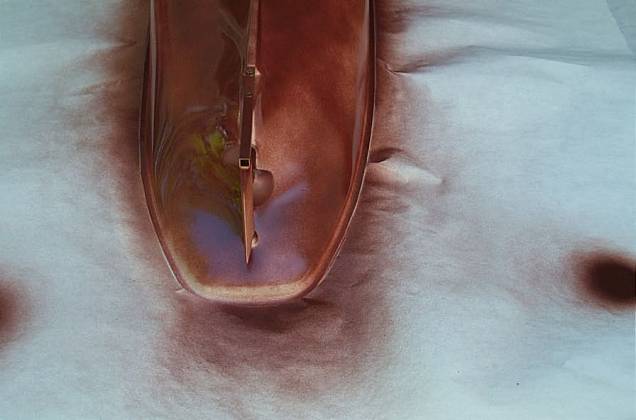 |
| The only area of the front that the side painting didn't cover is the thin area of the Keel at the bow. Don't point and spray. The can must be moving when you press the nozzle. | 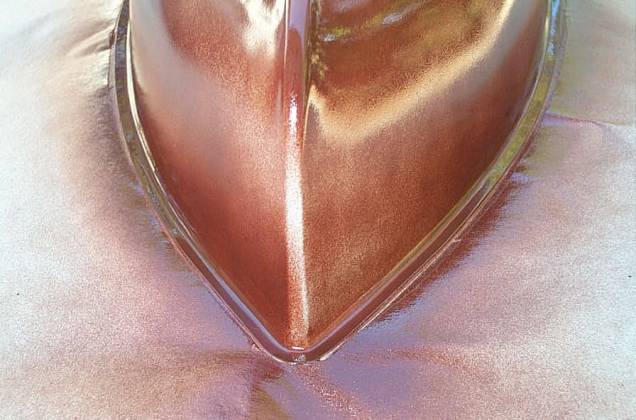 |
| Look how thin the paint is. This is a good first coat. Don't spray to a wet gloss. Just spray as even as you can. Let it "flash" for about 15 minutes until dry to the touch. "Flash" is a painting term meaning to allow the solvents in the paint to evaporate. |  |
| Note the over-spray on the paper. The first line of paint was centered on the edge of the hull where it meets the masking paper. The first coat of paint provides the foundation for the heavier 2nd coat. It must be dry to the touch before applying the 2nd coat. | 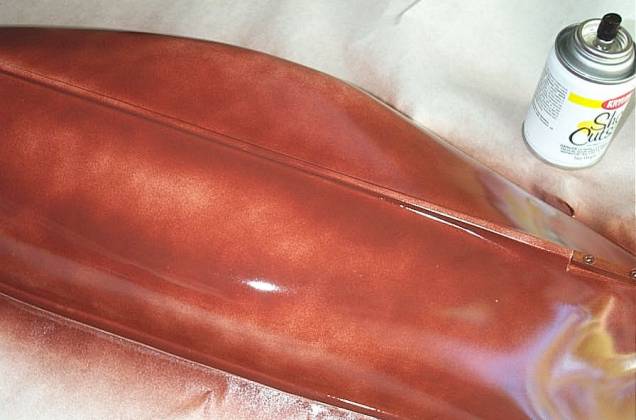 |
| Spray the 2nd coat heavy enough to look wet (gloss) and to look even. The first coat will help hold the 2nd in place until it flashes. After two coats, you may have good coverage on the hull, and on the masking paper as well. Some colors need 3 coats. If the 2nd coat doesn't cover, resist the urge to keep spraying. Let the 2nd coat flash before applying the 3rd coat. The 2nd coat will take twice as long to flash as the first coat. |  |
| There is enough paint in a small can to cover the hull with 3 coats. I recommend 3 coats on the hull for better durability. I often use only 2 coats (lighter colors) on the deck. | 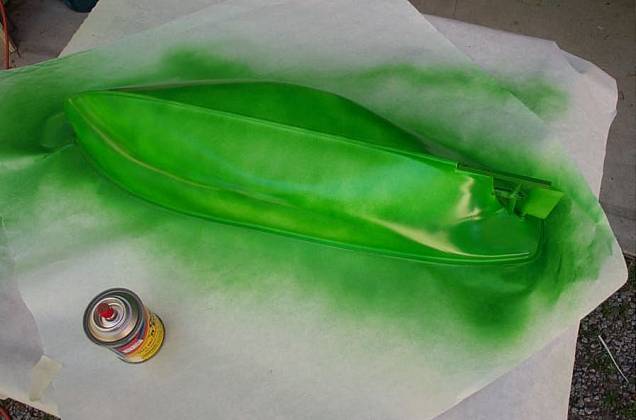 |
| Remove the tape at the bearing after the paint dries. | 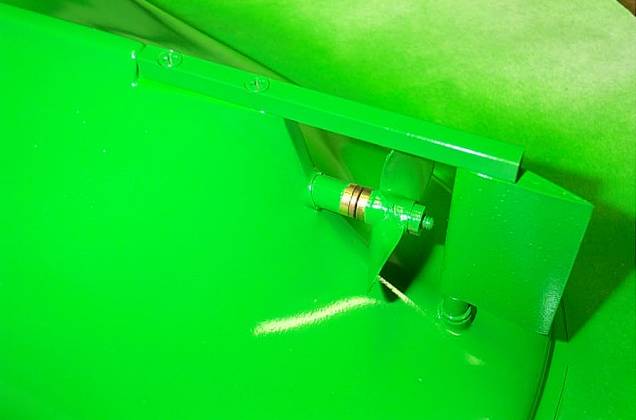 |
| Hobby enamel fully cures in 3 days. However, after a day or two of drying (depending on humidity & temperature) you can turn it over to paint the deck. Put packaging tape over the hatch and cabin opening. (Camera Boat deck shown.) | 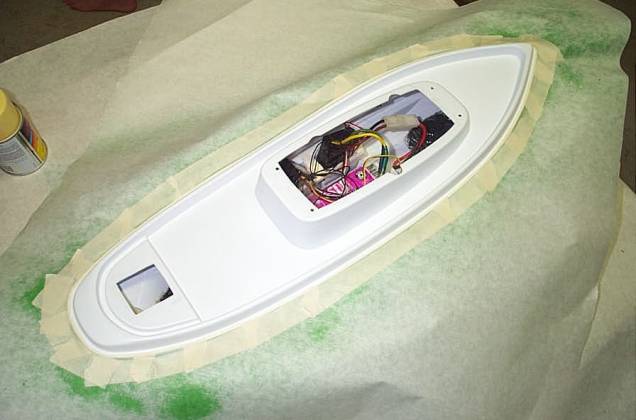 |
| In spraying the right side of the deck, look carefully to find all of the surfaces that face to the right. To reach the inside of the left Bulwark (side railing), aim down over the Cabin. | 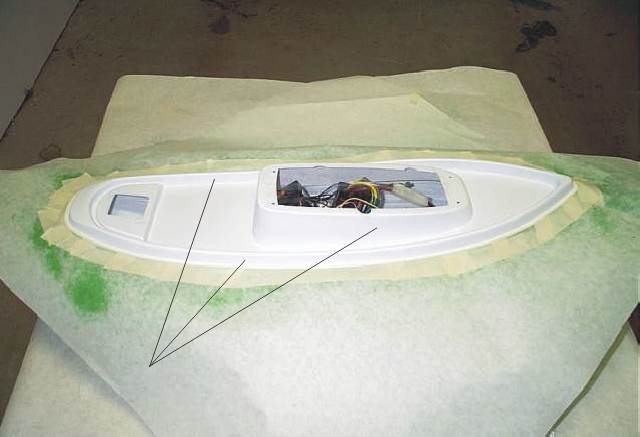 |
| From the stern, the areas that face rear are shown. | 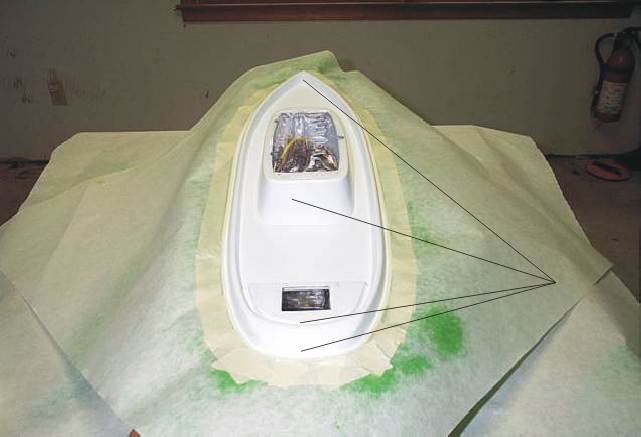 |
| I have sprayed the right side. I sprayed the whole oval area visible except for the top of the Cabin. (to save a little paint) |  |
| Turn the boat around and you will see what was missed. From this side, I concentrate along the white areas. No need to put additional coats on the deck surfaces that have a good first coat already. |  |
| After spraying both sides, it looks almost done. |  |
| However, when you look at the front, you see the forward facing areas need paint. Avoid pointing and spraying. Use a left-to-right pass, even for the tip of the bow. Don't forget the step-down in front of the rear hatch, behind the cabin. |  |
| Same with the stern. Paint this 4th side. |  |
| If the paint looks too thin on any of the top surfaces, you can touch them up now. Repeat this 5-side spray technique with the 2nd and, if necessary, 3rd coats. | 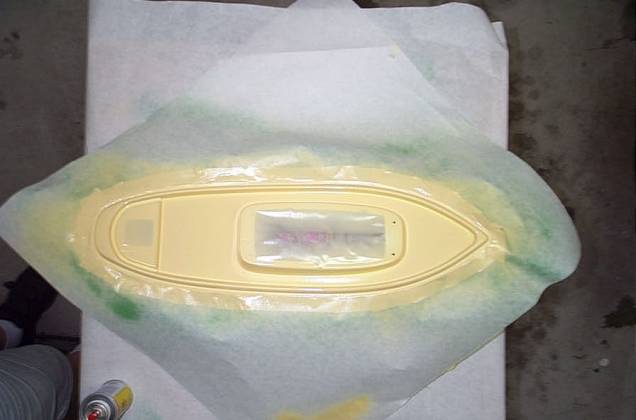 |
Wait 3 days until the paint is fully cured before attaching the Velcro or applying the vinyl decals. I've been impatient and sailed the boats the day after painting without problems. However, the paint will be easier to scratch until it cures and it will soften if exposed to oil or fuel floating on the water.
 TM
TM